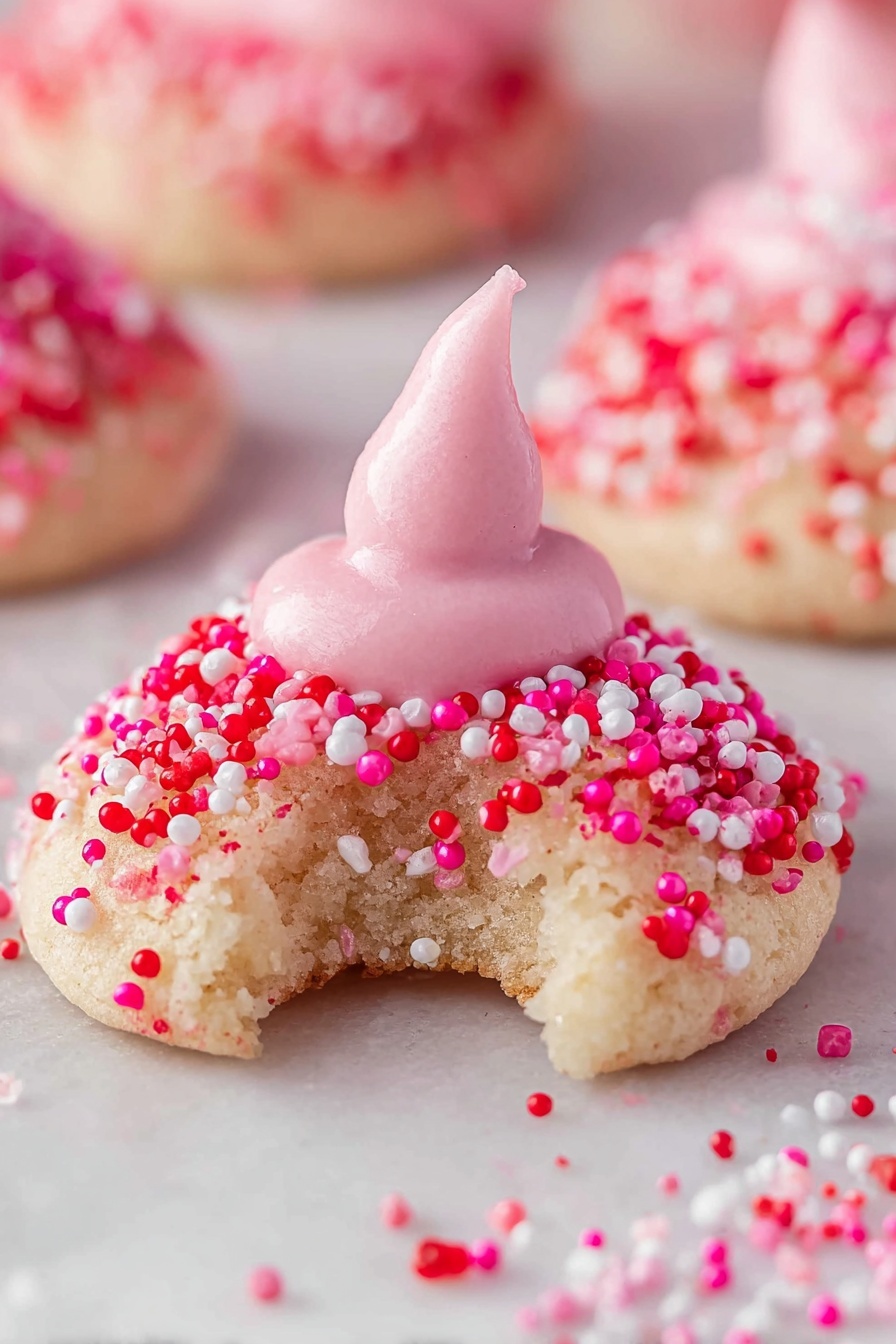
There’s just something magical about adding a pop of pink and a burst of fun to classic sugar cookies, right? That’s exactly what you get with this Strawberry Kiss Cookies Recipe — soft, cream cheese-infused funfetti sugar cookies rolled in sparkling sugar and crowned with a delicious Hershey's Strawberry Ice Cream Cone Kiss. Trust me, these playful bites will brighten up any party or cozy afternoon treat.

Jump to:
Why You'll Love This Recipe
When I first made these Strawberry Kiss Cookies, I couldn’t believe how easy and fun they were to whip up. Plus, everyone loved how the creamy dough and the bright strawberry chocolate created the perfect bite of sweetness and texture.
- Quick and Simple Prep: Using funfetti cookie mix with cream cheese makes the dough soft with minimal effort.
- Eye-Catching Presentation: Rolled in sanding sugar or colorful non-pareils, these cookies sparkle and look festive.
- Perfect Balance: The strawberry Hershey’s Kiss on top adds a creamy fruity finish without overpowering the cookie.
- Totally Shareable: Great for parties, bake sales, or gifting because they’re as fun to give as they are to eat.
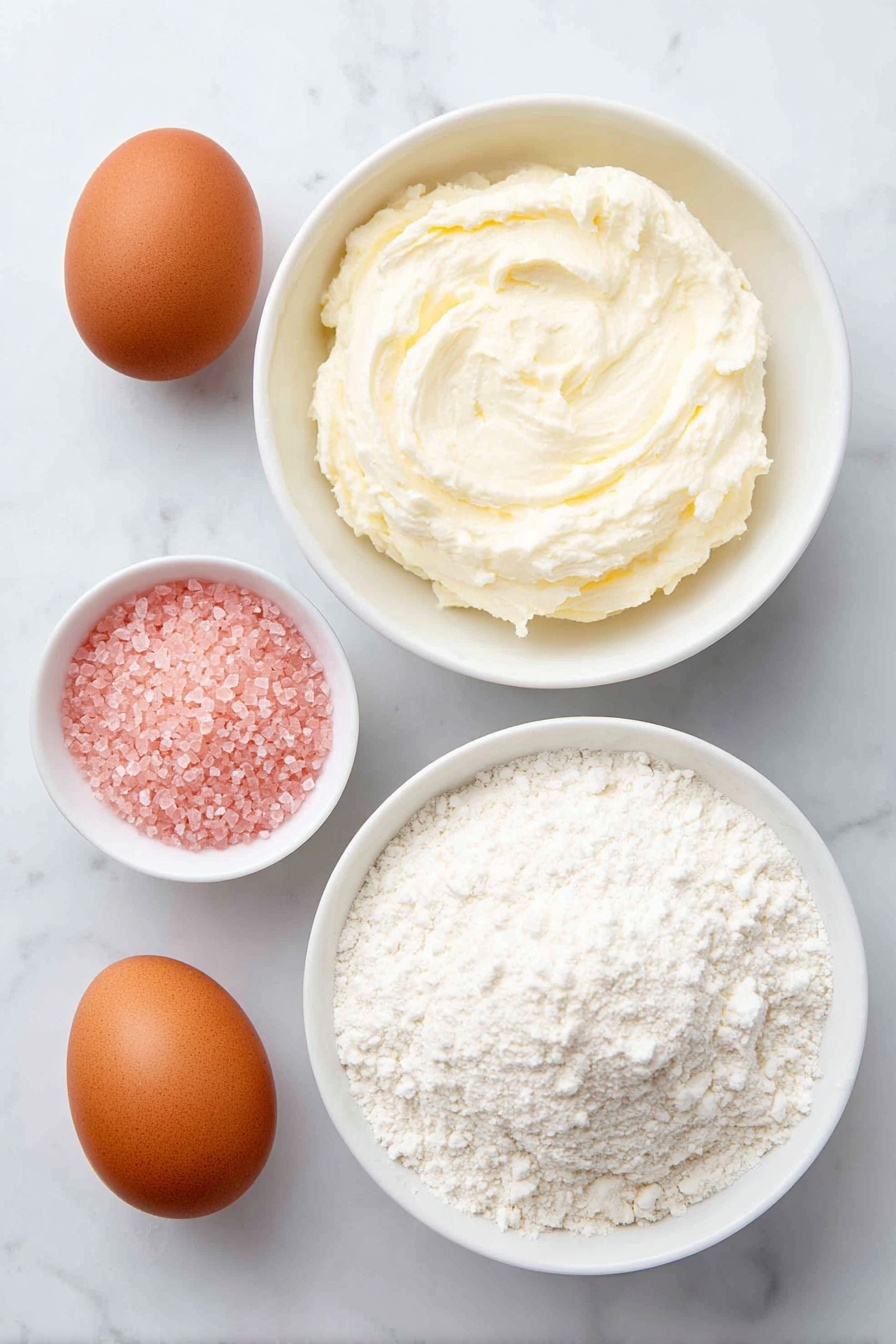
Ingredients & Why They Work
I like to keep shopping simple for this recipe, focusing on quality basics that come together easily. Here’s a quick rundown of what you’ll need and why each ingredient is key to achieving that perfect strawberry kiss cookie experience.
- Funfetti Sugar Cookie Mix: Gives you that funfetti charm with sprinkles and just the right cookie base without starting from scratch.
- Cream Cheese: Softens the dough and adds a subtle tanginess making these cookies irresistibly tender.
- Large Egg: Helps bind the dough together and adds richness.
- Pink or White Sanding Sugar or Non-Pareils: Adds sparkle and a slightly crunchy outer coating for visual appeal and texture.
- Hershey’s Strawberry Ice Cream Cone Kisses: The signature topper lending that fruity, creamy strawberry finish that seals the deal.
Make It Your Way
The great thing about this Strawberry Kiss Cookies Recipe is how easy it is to tailor it to your taste or occasion! Whether you want to experiment with different coatings or mix-ins, these funfetti sugar cookies are a fantastic canvas for creativity.
- Variation: For a little extra crunch and color, I’ve enjoyed swapping the sanding sugar for festive non-pareils—especially around holidays. They add a playful texture, although they don’t prevent sticking as much as sanding sugar. Just a heads-up for easier handling!
- Dietary tweak: Want a dairy-free version? Try using a cream cheese alternative that’s plant-based. The cookie mix often can be swapped for a gluten-free version, too, if that’s your preference. Just keep an eye on dough consistency for best results.
- Seasonal twist: Around Valentine’s Day, I love using pink sanding sugar paired with the Strawberry Ice Cream Cone Kisses for an extra festive look. Alternatively, for spring, pastel-colored non-pareils give these cookies a fresh, joyful vibe.
Step-by-Step: How I Make Strawberry Kiss Cookies Recipe
Step 1: Preheat and Prep for Success
Start by lining a large baking sheet with parchment paper to ensure your cookies come off easily and to keep cleanup simple. Then, preheat your oven to 375°F (190°C) so it’s perfectly hot by the time you’re ready to bake. It’s a small but important step that sets you up for cookie perfection.
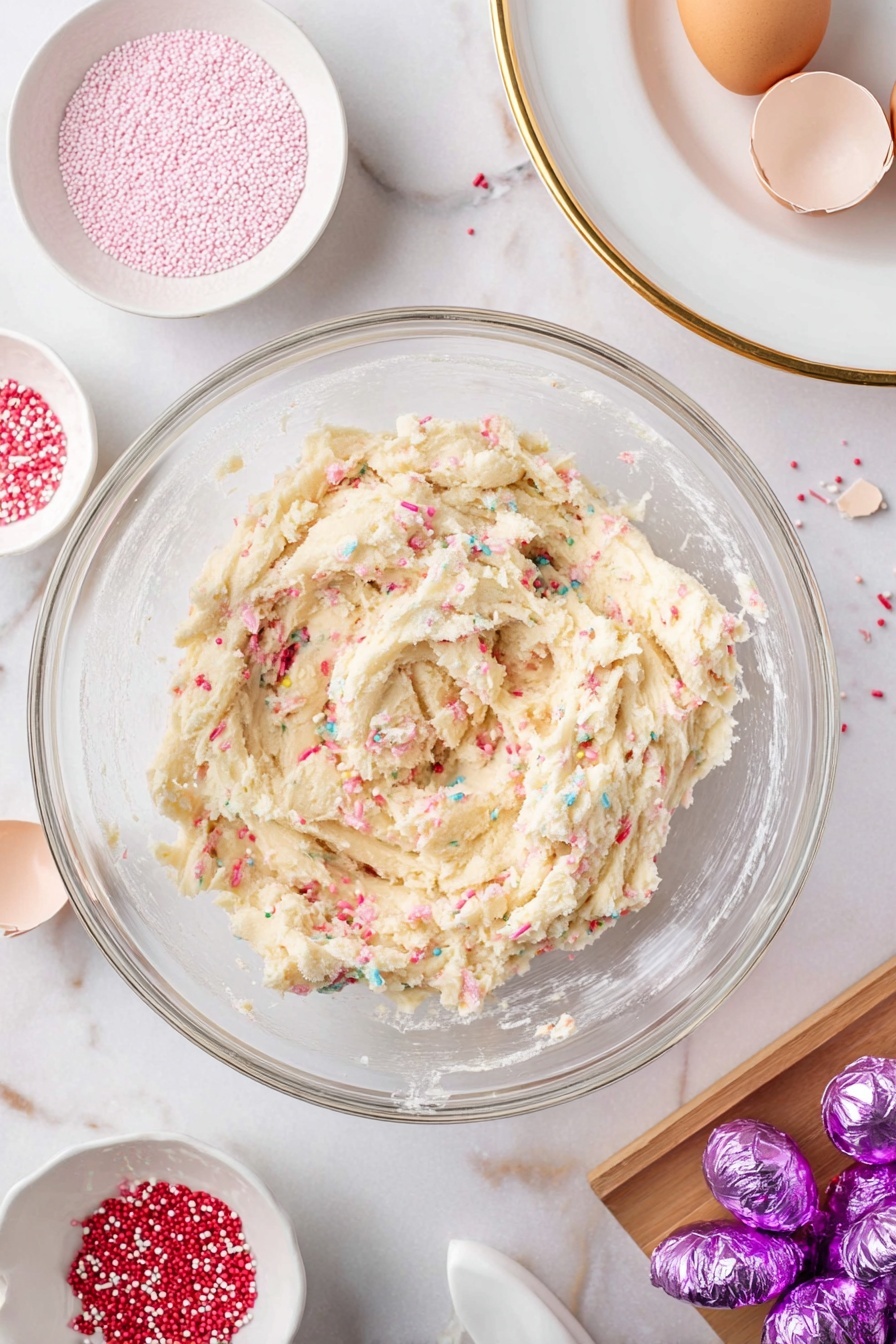
Step 2: Mix Up That Creamy Dough
Grab a large bowl and your mixer—hand or stand—and beat together the funfetti sugar cookie mix, softened cream cheese, and the large egg. You’re aiming for a soft, slightly sticky dough that’s bursting with those joyful sprinkles. If the dough feels too sticky to manage, don’t worry—refrigerate it for 30 to 60 minutes. This little chill helps the dough firm up just enough to handle without losing its softness.
Step 3: Coat the Dough Balls in Sparkle
Pour your choice of pink or white sanding sugar—or non-pareils—into a shallow bowl. Using a 1 ½ tablespoon cookie scoop, scoop the dough and drop each ball directly into the sugary coating. Roll it gently between your hands to cover the dough completely, shaping it into a neat, smooth ball. This sugary coating adds a delightful crunch and a hint of sparkle that makes these cookies extra special.
Step 4: Space Them Out and Bake
Arrange your coated cookie dough balls on the prepared baking sheet, spacing them about 1 ½ inches apart. This spacing gives the cookies room to spread without merging into one another. Pop the tray in your preheated oven and bake for 12 minutes—or just until the edges are set and slightly firm. You’ll notice the cookies puff a little and the sugar coating will catch the light beautifully.
Step 5: Add the Iconic Strawberry Kiss
Once baked, let your cookies cool on the baking sheet for 3 to 5 minutes—just enough time for them to settle but still be warm. Now comes the fun part: gently press an unwrapped Hershey’s Strawberry Ice Cream Cone Kiss into the center of each cookie. This warm cookie will slightly soften the Kiss, creating a luscious, creamy center that’s as pretty as it is tasty.
Step 6: Cool and Enjoy
Transfer your cookies to a cooling rack to set completely if you prefer a firmer Kiss, or serve them warm if you love that soft, melty center. Remember, how long you wait to press in the Kisses influences their texture—the sooner you add them after baking, the softer they’ll be. Either way, you’re in for a treat!
Top Tip
These Strawberry Kiss Cookies are a delightful treat, but a few handy tips can make your baking experience even better and ensure perfect results every time.
- Handling Sticky Dough: I found that chilling the dough for 30 to 60 minutes really helps with scooping and rolling. Coating your hands and cookie scoop lightly with sanding sugar also works wonders to keep things from sticking too much.
- Cookie Cooling Time: From personal trial, pressing the Strawberry Kisses into the cookies after they’ve cooled for about 3 to 5 minutes strikes the perfect balance. The chocolates soften a little without completely melting and losing shape.
- Choosing Your Coating: Sanding sugar is my go-to for rolling the dough because it prevents sticking and adds a lovely sparkle, while non-pareils create cute texture but are a bit trickier to work with.
- Storage Mistake to Avoid: Don’t cover or store the cookies while they are still warm. This can deform the Strawberry Kisses and affect the cookie’s shape—patience here pays off!
How to Serve Strawberry Kiss Cookies Recipe
Garnishes
To make your Strawberry Kiss Cookies even more festive, try sprinkling a few extra non-pareils or sanding sugar around the edges after baking. A light dusting of powdered sugar can add a touch of elegance for special occasions. For a fun twist, serve them alongside fresh strawberries or a drizzle of white chocolate.
Side Dishes
These cookies pair beautifully with a cold glass of milk or a cup of lightly brewed herbal tea. For parties, consider serving them with a strawberry or vanilla ice cream sundae bar, or alongside other pink-themed treats like raspberry macarons or strawberry cupcakes to keep the theme going.
Make Ahead and Storage
Storing Leftovers
Once fully cooled, store your Strawberry Kiss Cookies in an airtight container at room temperature for up to 3-4 days. They stay fresh and chewy during this time, perfect for snacking or sharing with friends.
Freezing
You can freeze these cookies for 2-3 months. For best results, freeze them in a single layer on a baking sheet first, then transfer to a freezer-safe airtight container or bag. Thaw at room temperature when ready to enjoy.
Reheating
If you prefer warm cookies, gently reheat them in a microwave for about 10-15 seconds or pop them in a 300°F oven for 3-5 minutes. Just be careful not to melt the Strawberry Kisses too much — warm, soft, but still shaped is the sweet spot!
Frequently Asked Questions:
Absolutely! While the Strawberry Ice Cream Cone Kisses add a fun strawberry twist, you can use any Hershey’s Kisses you like. Just remember the flavor and texture will vary slightly.
If you find the dough too sticky, refrigerate or freeze it for 30-60 minutes before scooping and rolling. Also, lightly dust your hands and scoop with sanding sugar to avoid sticking.
I recommend letting the cookies cool on the baking sheet for 3 to 5 minutes before pressing in the Kisses. This way, they soften slightly without melting completely.
Stored properly in an airtight container at room temperature, these cookies stay fresh for 3-4 days. Refrigeration can extend their life up to a week, and freezing up to 2-3 months.
Final Thoughts
Making Strawberry Kiss Cookies is a joyful experience—both in the baking and the sharing. These sweet, sparkly cookies bring a burst of fun to any occasion and are sure to brighten your day. Whether you’re baking for a party or a cozy afternoon treat, I hope this recipe fills your kitchen with warmth and happiness. Happy baking!
Print
Strawberry Kiss Cookies Recipe
- Prep Time: 10 minutes
- Chill Time: 30 minutes
- Cook Time: 12 minutes
- Total Time: 52 minutes
- Yield: 18 cookies
- Category: Dessert
- Method: Baking
- Cuisine: American
- Diet: Vegetarian
Description
Strawberry Kiss Cookies are soft, funfetti sugar cookies featuring a creamy cream cheese dough rolled in sparkling sanding sugar or non-pareils and topped with a delightful Hershey's Strawberry Ice Cream Cone Kiss. These playful cookies offer a perfect balance of sweetness and texture, ideal for parties or special occasions.
Ingredients
Cookie Dough
- 16 ounce bag Funfetti Sugar Cookie Mix
- 4 ounce cream cheese softened (half of an 8-ounce package)
- 1 large egg
Coating and Topping
- ½ cup pink or white sanding sugar or non-pareils
- 18 Hershey’s Strawberry Ice Cream Cone Kisses, unwrapped
Instructions
- Preheat Oven and Prepare Baking Sheet: Line a large baking sheet with parchment paper and preheat your oven to 375 degrees Fahrenheit to ensure it's ready for baking.
- Make the Dough: In a large mixing bowl, use a hand or stand mixer to beat together the funfetti sugar cookie mix, softened cream cheese, and large egg until combined into a soft dough.
- Prepare the Coating: Pour the pink or white sanding sugar or non-pareils into a shallow bowl for easy coating.
- Scoop and Coat Dough Balls: Using a 1 ½ tablespoon cookie scoop, scoop out balls of dough and drop them into the bowl of sugar or non-pareils. Roll the dough gently until coated and form into even balls.
- Optional Chill for Easier Handling: If the dough is too sticky to scoop and roll, refrigerate or freeze it for 30 to 60 minutes to make it easier to handle but still slightly sticky.
- Arrange on Baking Sheet: Place the coated cookie balls on the prepared baking sheet, spacing them about 1 ½ inches apart to allow for spreading.
- Bake Cookies: Bake in the preheated oven for 12 minutes or until the edges are set and slightly firm.
- Cool Slightly and Add Strawberry Kisses: Allow the cookies to cool on the baking sheet for 3 to 5 minutes. Then, press an unwrapped Hershey’s Strawberry Ice Cream Cone Kiss into the center of each cookie.
- Cool Completely or Serve Warm: Transfer the cookies to a cooling rack to cool completely to set the shape of the Kisses, or serve them warm based on your preference.
Notes
- Store cooled cookies in an airtight container at room temperature for 3-4 days or refrigerate for up to one week.
- You can freeze these cookies for 2-3 months to enjoy later without losing quality.
- Do not cover or store cookies while warm, as this may deform the Strawberry Kisses.
- If dough is sticky, coating hands or cookie scoop lightly with sanding sugar can help with handling.
- The amount of cooling time before pressing in the Kisses affects how soft or hard the chocolates become—pressing them immediately after baking will make them melt, while cooling fully will keep them firm.
- Non-pareils do not prevent sticking like sanding sugar but still help in coating the dough balls nicely.
Nutrition
- Serving Size: 1 cookie
- Calories: 150 kcal
- Sugar: 12 g
- Sodium: 120 mg
- Fat: 7 g
- Saturated Fat: 3.5 g
- Unsaturated Fat: 3 g
- Trans Fat: 0 g
- Carbohydrates: 19 g
- Fiber: 0.5 g
- Protein: 2 g
- Cholesterol: 20 mg


Leave a Reply