If you’re anything like me, you know that sometimes you just want a dessert that’s both rich and a little bit special. That’s why I’m so excited to share this Red Velvet Brownies with Cream Cheese Frosting Recipe that brings together all the best parts of red velvet cake and brownies into one fudgy, luscious treat.

Jump to:
- Why You'll Love This Recipe
- Ingredients & Why They Work
- Make It Your Way
- Step-by-Step: How I Make Red Velvet Brownies with Cream Cheese Frosting Recipe
- Top Tip
- How to Serve Red Velvet Brownies with Cream Cheese Frosting Recipe
- Make Ahead and Storage
- Frequently Asked Questions:
- Final Thoughts
- Red Velvet Brownies with Cream Cheese Frosting Recipe
Why You'll Love This Recipe
I’ve made a lot of brownies in my kitchen, but these red velvet beauties with their creamy cream cheese frosting are hands-down a favorite to bring to parties or just enjoy on a cozy night in. They strike the perfect balance between chewy and cakey with just the right amount of sweetness.
- Fudgy Texture: These brownies have that dense, chewy bite we all crave, but with a velvety smooth twist.
- Classic Flavor Combo: Red velvet meets cream cheese frosting—just like your favorite cake but in brownie form.
- Simple Ingredients: No fancy stuff needed; you probably have everything in your pantry already.
- Perfect for Any Occasion: Whether it’s a birthday, holiday, or just a craving, these brownies shine every time.
Ingredients & Why They Work
Before you dive in, let’s talk about the ingredients that make this recipe so special—and a couple of tips to get you the best brownies possible. Using unsalted butter gives you control over the saltiness, and the red gel food coloring ensures that vibrant signature red without watering down the batter.
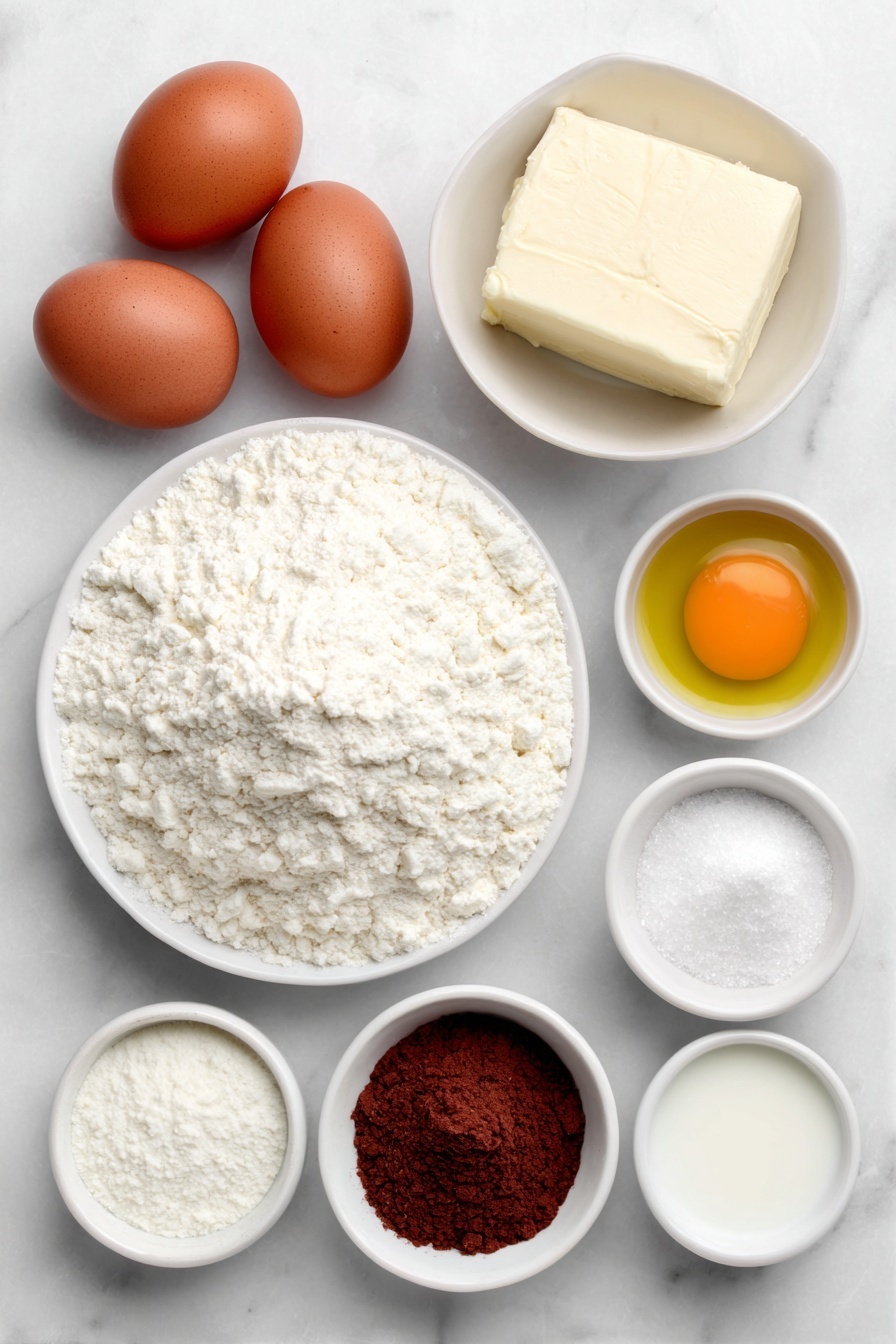
- Unsalted Butter: Melting it enhances moisture and richness, plus starting with unsalted lets you regulate salt.
- All-Purpose Flour: The base that gives structure without making brownies cakey.
- Cornstarch: Helps tenderize the crumb so these brownies aren’t too dense.
- Salt: Balances sweetness and deepens flavor.
- Natural Cocoa Powder: Adds that subtle chocolate note that plays perfectly with the red velvet flavor.
- Granulated Sugar: Sweetens and contributes to the chewy texture.
- Eggs and Egg Yolk: Provide structure and richness, making brownies tender and fudgy.
- Vegetable Oil: Keeps the brownies moist and helps retain that soft texture over time.
- White Vinegar: Reacts with the cocoa and baking agents to bring out the classic tangy red velvet flavor.
- Vanilla Extract: Adds depth and rounds out the flavors.
- Red Gel Food Coloring: Gives that vivid red hue we all expect without adding extra liquid.
- Cream Cheese: Softened for the luscious frosting with a slight tang to cut the sweetness.
- Unsalted Butter: Paired with cream cheese to make a fluffy, creamy frosting base.
- Powdered Sugar: Sweetens and thickens the frosting to that perfect spreadable texture.
- Optional Salt and Milk or Heavy Cream: These help balance and adjust the frosting’s consistency for easy spreading.
Make It Your Way
One of the best parts about this Red Velvet Brownies with Cream Cheese Frosting Recipe is how easy it is to personalize. Whether you want to dial up the chocolate, adjust the sweetness, or make it fit your dietary needs, there’s plenty of room to make these brownies uniquely yours.
- Vegan Variation: I’ve tried swapping the eggs with flax eggs (1 tablespoon flaxseed meal + 3 tablespoon water per egg) and used dairy-free cream cheese and vegan butter in the frosting. The texture changes slightly, but the rich red velvet flavor still shines through beautifully!
- Extra Fudgy: If you prefer your brownies extra dense and chewy, I recommend baking them for 40-45 minutes, especially if using a glass pan. This time adjustment gives them that satisfying chew without drying them out.
- Seasonal Twist: Adding a teaspoon of espresso powder into the dry ingredients really enhances the cocoa notes—perfect for cool autumn evenings.
- Color Pop: Using gel food coloring is key to that vibrant red shade without thinning your batter. I always keep a little extra gel food color on hand to deepen the tone if I want a bolder look.
Step-by-Step: How I Make Red Velvet Brownies with Cream Cheese Frosting Recipe
Step 1: Preheat and Prepare Your Pan
Start by preheating your oven to 350°F. I line an 8×8 or 9×9-inch baking pan with parchment paper. This little step ensures your brownies come out in one beautiful piece, making clean-up and serving so much easier.
Step 2: Melt Butter and Mix Dry Ingredients
Place ½ cup (113g) of unsalted butter in a microwave-safe bowl and melt it. Set it aside to cool—a warm butter can scramble your eggs if added too soon! While it’s cooling, whisk together your ¾ cup (90g) all-purpose flour, 1 tablespoon cornstarch, ½ teaspoon salt, and ⅓ cup (28g) unsweetened natural cocoa powder in a medium bowl until combined. This dry mix is the foundation that gives your brownies their fudgy texture and classic red velvet flavor.
Step 3: Beat Butter, Sugar, and Eggs
Using a stand mixer or hand mixer, beat the cooled melted butter with 1¼ cups (248g) granulated sugar, 2 large eggs, and 1 large egg yolk. Whip this mixture for 60 seconds—you’ll notice it lightens to a pale yellow and nearly doubles in volume. This aeration is what creates that tender crumb in your brownies.
Step 4: Add Oil, Vinegar, and Vanilla
Slowly add ¼ cup (59ml) vegetable oil, 1 tablespoon white vinegar, and 1 teaspoon vanilla extract to your batter while continuing to mix on low speed. The vinegar and vanilla add that unmistakable red velvet tang and aroma, while the oil ensures these brownies stay moist and tender.
Step 5: Combine Dry Ingredients and Red Food Coloring
Gradually fold the dry ingredients into the wet mixture. Then, stir in 1 teaspoon of red gel food coloring until the batter is smooth and displays that signature vibrant hue. Make sure you scrape the bowl sides to fully incorporate all ingredients—nothing worse than flour pockets in your brownies!
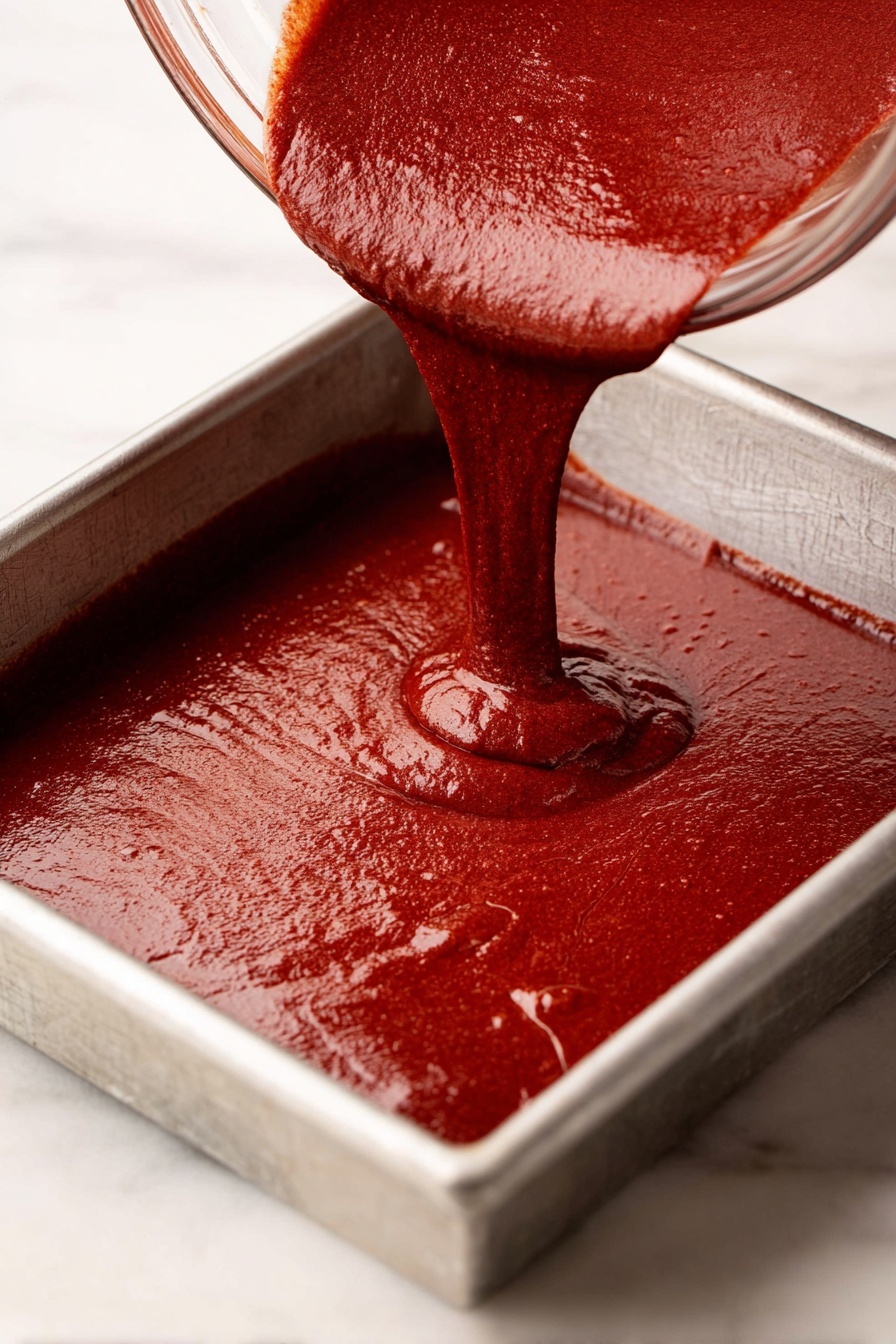
Step 6: Bake to Perfection
Pour the batter into your prepared pan and smooth out the top. Bake for 35-40 minutes if you’re using a glass pan, or 30-35 minutes for a metal pan. Insert a toothpick near the center; when it comes out clean (or with a few moist crumbs), your brownies are ready! If you crave a chewier, less fudgy texture, extend the baking time to 40-45 minutes. Remember, the brownies will continue to set as they cool.
Step 7: Cool Completely
Patience pays off here — let your brownies cool completely in the pan, ideally for about an hour. This step is crucial so your luscious cream cheese frosting won’t melt and slide off when you spread it.
Step 8: Whip Up the Cream Cheese Frosting
In a mixing bowl, beat together 4 oz (114g) softened cream cheese and ¼ cup (57g) softened unsalted butter on medium speed for 1-2 minutes. You’ll want the frosting to become fluffy and whipped—this texture is pure bliss atop your brownies.
Step 9: Add Vanilla and Powdered Sugar
Mix in 1 teaspoon vanilla extract, 2 cups (227g) powdered sugar, and if you like, a pinch of salt to balance the sweetness. Beat on low for 1-2 minutes, scraping down the bowl sides as needed. Gradually add up to 2 more cups of powdered sugar until the frosting reaches your desired consistency.
Step 10: Adjust and Spread Your Frosting
If your frosting feels too thick, add a splash of milk or heavy cream and beat until it’s creamy and easy to spread. Once ready, gently spread it evenly over your cooled brownies. To make slicing neat and clean, I pop the frosted brownies in the freezer for 15-20 minutes before cutting. Using a sharp knife, wiping the blade between slices makes all the difference for perfect squares.
Top Tip
Getting the perfect texture and flavor in your Red Velvet Brownies with Cream Cheese Frosting Recipe is easier when you keep a few handy tips in mind. These little tricks can elevate your baking game and help you avoid common pitfalls.
- Using Parchment Paper: This is my go-to for easy brownie removal. It prevents cracking and breaking—lifting out the whole slab makes frosting and slicing so much neater.
- Baking Time Awareness: Through trial and error, I learned that glass pans take a bit longer to bake than metal ones, so always test with a toothpick. Adjust the timing depending on whether you prefer fudgy or chewy brownies.
- Frosting Spread Technique: Always let the brownies cool completely before frosting. I’ve found that frosting on warm brownies tends to melt and slide, which is messy. Pop them in the freezer for 15–20 minutes after frosting for clean, sharp slices.
- Food Coloring Choice: Gel food coloring keeps that vibrant red without thinning the batter. I avoided liquid dyes because they made my batter runnier and dulled the color.
How to Serve Red Velvet Brownies with Cream Cheese Frosting Recipe
Garnishes
To make your red velvet brownies extra special, consider garnishing with a few fresh raspberries or a dusting of cocoa powder. A sprinkle of finely chopped pecans or walnuts adds a delightful crunch that complements the fudgy texture. For a festive touch, you can drizzle a bit of melted dark chocolate over the top or scatter some colorful sprinkles on the cream cheese frosting.
Side Dishes
These brownies shine as a dessert on their own, but pairing them with a scoop of vanilla ice cream or a dollop of whipped cream takes the experience to the next level. A cup of freshly brewed coffee or a creamy latte balances the sweetness beautifully. For celebrations, serving alongside fresh berries or a simple fruit salad lightens the richness and adds vibrant freshness.
Make Ahead and Storage
Storing Leftovers
Once frosted, store your red velvet brownies in an airtight container in the refrigerator. They’ll stay fresh and delicious for up to 4 days. Make sure the container is sealed tightly to prevent the brownies from drying out or absorbing other fridge odors.
Freezing
If you want to make these ahead or save some for later, you can freeze the brownies without frosting for up to 3 months. Wrap them tightly with plastic wrap and then a layer of foil or place in a freezer-safe container. Thaw overnight in the fridge, then frost just before serving to keep the frosting fresh and fluffy.
Reheating
For a warm treat, reheat individual brownie squares in the microwave for about 10-15 seconds. Avoid reheating the whole pan to prevent the frosting from melting too much. If you want the frosting softer, let the brownies sit at room temperature for a bit before serving.
Frequently Asked Questions:
Gel food coloring is preferred because it provides vibrant color without altering the batter’s consistency. Using liquid coloring may thin out the batter and affect the texture and color intensity of your brownies.
Insert a toothpick into the center; it should come out clean or with just a few moist crumbs (not wet batter). Baking time varies by pan type—glass pans need 35-40 minutes, metal pans about 30-35 minutes for fudgier brownies.
Yes! Substitute the eggs with flax eggs and use dairy-free cream cheese and butter alternatives in the frosting. The texture will be slightly different but still delicious.
For clean slices, chill the frosted brownies in the freezer for 15-20 minutes. Use a sharp knife, wiping the blade clean between each cut to prevent smudging the frosting and ensure neat edges.
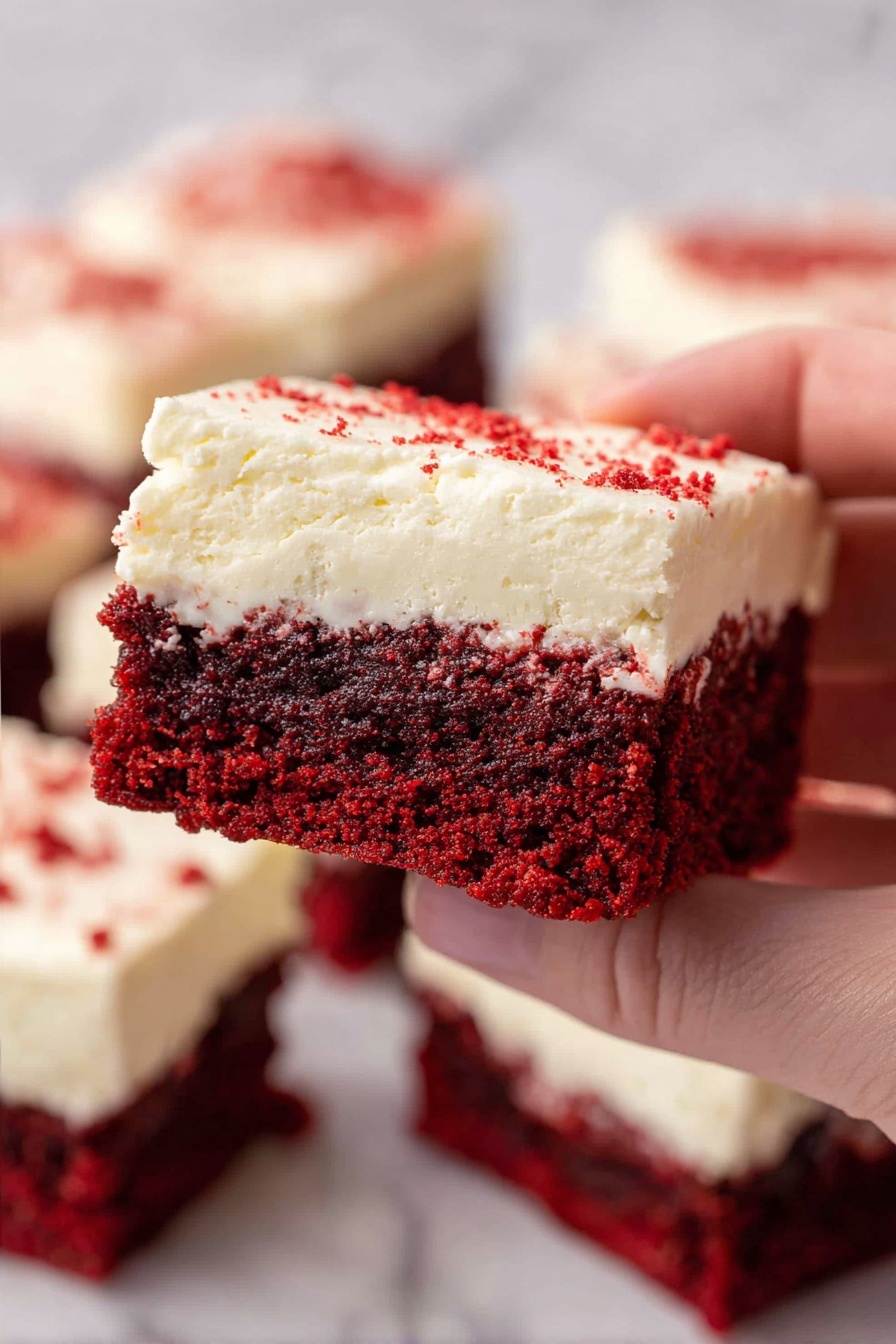
Final Thoughts
Making these Red Velvet Brownies with Cream Cheese Frosting feels like creating a little bit of magic in your kitchen. Each bite is a delightful blend of rich, fudgy brownie and silky frosting, a combination that’s simply irresistible. Whether it’s a special occasion or just a cozy night in, these brownies bring warmth and joy with every slice. I hope these tips and serving ideas inspire you to bake these beauties again and again!
Print
Red Velvet Brownies with Cream Cheese Frosting Recipe
- Prep Time: 15 minutes
- Cooling Time: 1 hour
- Cook Time: 40 minutes
- Total Time: 1 hour 55 minutes
- Yield: 12 brownies
- Category: Dessert
- Method: Baking
- Cuisine: American
- Diet: Vegetarian
Description
Deliciously rich red velvet brownies topped with creamy, fluffy cream cheese frosting. These fudgy brownies combine the classic flavors of red velvet cake with a dense, chewy texture, perfect for dessert or any special occasion.
Ingredients
Red Velvet Brownies
- ½ cup (113g) unsalted butter, melted and cooled
- ¾ cup (90g) all-purpose flour
- 1 tablespoon cornstarch
- ½ teaspoon salt
- ⅓ cup (28g) unsweetened natural cocoa powder
- 1 ¼ cups (248g) granulated sugar
- 2 large eggs
- 1 large egg yolk
- ¼ cup (59ml) vegetable oil
- 1 tablespoon white vinegar
- 1 teaspoon vanilla extract
- 1 teaspoon red gel food coloring
Cream Cheese Frosting
- 4 oz (114g) cream cheese, softened
- ¼ cup (57g) unsalted butter, softened
- 1 teaspoon vanilla extract
- 2-4 cups (227-454g) powdered sugar
- optional: ⅛ teaspoon salt
- optional: dash of milk or heavy cream
Instructions
- Preheat and prepare pan: Preheat the oven to 350°F. Line an 8×8 or 9×9-inch pan with parchment paper to ensure easy brownie removal after baking.
- Melt butter and mix dry ingredients: In a microwave-safe bowl, melt the butter and set it aside to cool. In a medium bowl, whisk together the flour, cornstarch, salt, and cocoa powder until well combined.
- Beat wet ingredients: Using a stand mixer or hand mixer, beat the melted butter, granulated sugar, eggs, and egg yolk together for 60 seconds until the mixture becomes pale yellow and doubles in volume.
- Add oil, vinegar, and vanilla: Slowly add the vegetable oil, white vinegar, and vanilla extract to the batter while mixing on low speed, combining all ingredients evenly.
- Incorporate dry ingredients and food coloring: Gradually add the dry flour mixture and red gel food coloring to the wet mixture, mixing until fully combined and smooth.
- Bake the brownies: Pour the batter into the prepared pan. Bake for 35-40 minutes in a glass pan or 30-35 minutes in a metal pan until a toothpick inserted in the center comes out clean. For chewier, less fudgy brownies, bake for 40-45 minutes.
- Cool completely: Allow the brownies to cool completely in the pan before frosting to ensure the frosting spreads smoothly without melting.
- Prepare cream cheese frosting: In a mixing bowl, beat the softened cream cheese and unsalted butter on medium speed for 1-2 minutes until fluffy and whipped.
- Add vanilla and powdered sugar: Add the vanilla extract, 2 cups of powdered sugar, and optional salt. Beat on low for 1-2 minutes, scraping down the sides of the bowl, then gradually add up to 2 more cups of powdered sugar to reach desired frosting consistency.
- Adjust frosting consistency: If the frosting is too thick, add a splash of milk or heavy cream and beat until creamy and spreadable.
- Frost the brownies: Spread the cream cheese frosting evenly over the cooled brownies. For clean slices, place the frosted brownies in the freezer for 15-20 minutes before cutting. Use a sharp knife and wipe the blade clean between cuts for best results.
Notes
- Use parchment paper to easily lift brownies from the pan without breaking.
- Adjust baking time depending on pan type and desired fudginess; longer baking yields chewier brownies.
- For a consistent red color, use gel food coloring instead of liquid dyes.
- Allow brownies to cool completely before frosting to prevent melting and sliding.
- If frosting becomes too soft, refrigerate for 10-15 minutes before spreading.
- Store brownies in an airtight container in the fridge for up to 4 days.
- For a vegan version, substitute eggs with flax eggs and use dairy-free cream cheese and butter alternatives.
Nutrition
- Serving Size: 1 brownie
- Calories: 280 kcal
- Sugar: 25 g
- Sodium: 150 mg
- Fat: 16 g
- Saturated Fat: 7 g
- Unsaturated Fat: 7 g
- Trans Fat: 0 g
- Carbohydrates: 31 g
- Fiber: 2 g
- Protein: 3 g
- Cholesterol: 50 mg


Leave a Reply