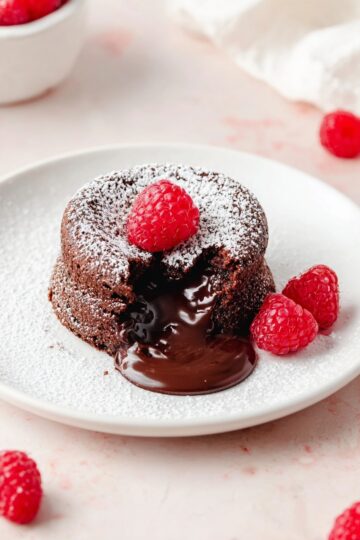
If you’re a fan of all things rich, gooey, and downright indulgent, this Peanut Butter Chocolate Lava Cakes Recipe is your next kitchen adventure. Imagine biting into a warm chocolate cake with a molten peanut butter center that just melts in your mouth – pure dessert nirvana!

Jump to:
- Why You'll Love This Recipe
- Ingredients & Why They Work
- Make It Your Way
- Step-by-Step: How I Make Peanut Butter Chocolate Lava Cakes Recipe
- Top Tip
- How to Serve Peanut Butter Chocolate Lava Cakes Recipe
- Make Ahead and Storage
- Frequently Asked Questions:
- Final Thoughts
- Peanut Butter Chocolate Lava Cakes Recipe
Why You'll Love This Recipe
I honestly get so excited every time I make these lava cakes—they’re not only breathtakingly delicious but also surprisingly easy to put together. Whether it’s for a special occasion or just a treat-yourself moment, these cakes always wow the crowd.
- Decadent Flavor Combo: Semi-sweet chocolate meets creamy peanut butter for a flavor match made in heaven.
- Easy & Fast: From start to finish, it’s just about 35 minutes—perfect for a quick yet impressive dessert.
- Individual Portions: These cakes bake in single-serve ramekins, making every bite feel personalized and special.
- Versatile Serving: Pair them with ice cream, drizzle with chocolate or melted peanut butter to customize each serving.
Ingredients & Why They Work
When it comes to making these lava cakes, using quality ingredients really makes a difference. You’ll want to pick up a good semi-sweet chocolate and creamy peanut butter for that perfectly smooth molten center.
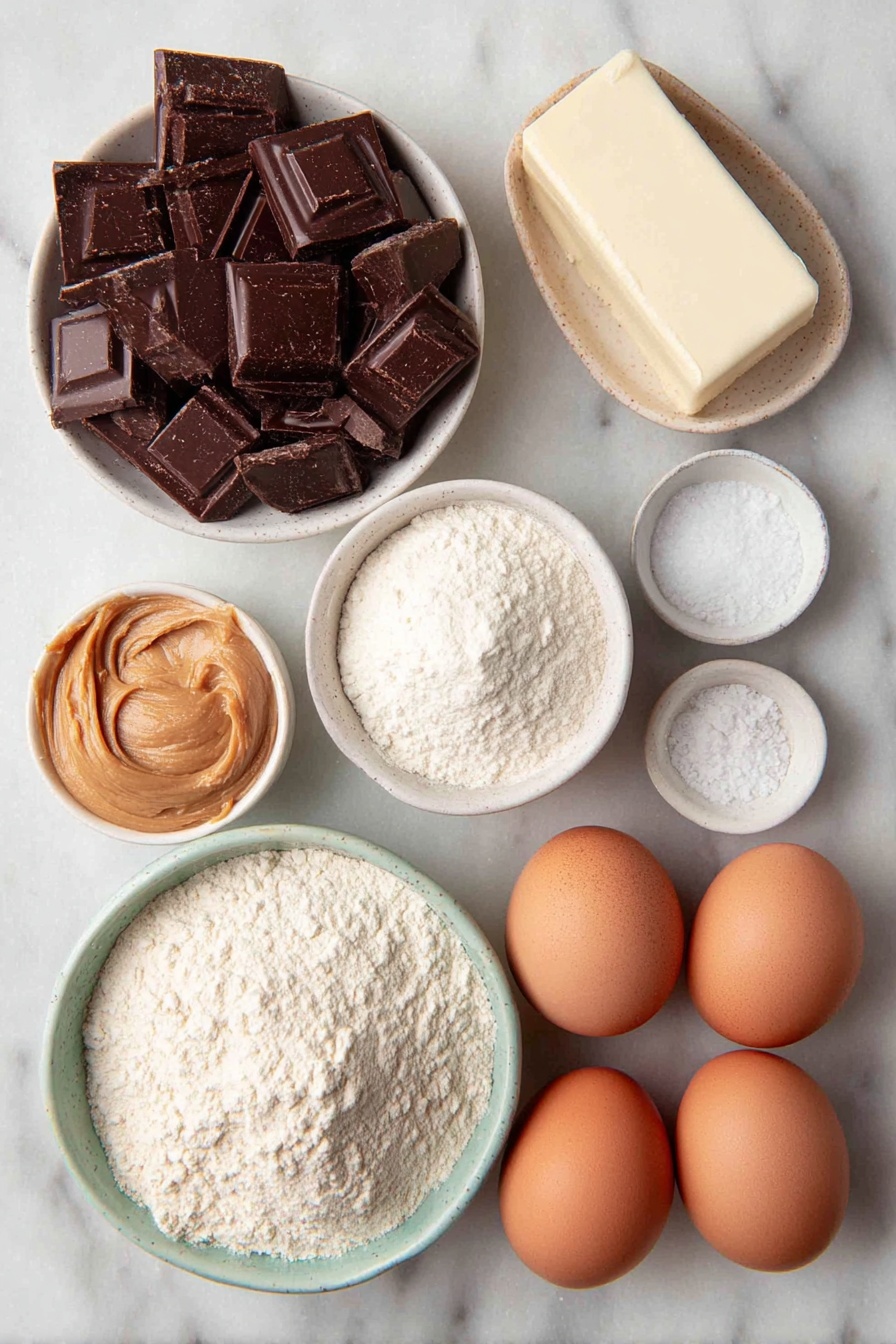
- Semi-sweet chocolate: I like Ghirardelli or Lindt for their smooth melting quality and rich flavor balance—key to that luscious lava texture.
- Unsalted butter: It adds a silky richness; unsalted lets you control how much salt goes into the batter.
- All-purpose flour: Just enough to give the cakes structure without making them heavy.
- Confectioners’ sugar: Provides the right touch of sweetness and tenderness to the batter.
- Salt: A tiny pinch enhances all the flavors and balances sweetness perfectly.
- Eggs and egg yolks: They help create that tender crumb and give the cakes their signature fudgy texture.
- Creamy peanut butter: Smooth and commercial-brand like Jif or Skippy works best—natural or crunchy varieties just won’t melt into that beautiful molten center quite right.
- Optional toppings: Ice cream, melted peanut butter, or chocolate syrup take this dessert from amazing to unforgettable.
Make It Your Way
One of the best parts about this Peanut Butter Chocolate Lava Cakes Recipe is how easy it is to tweak and make your own. Whether you want to add a little seasonal twist or adjust for dietary preferences, these cakes are a delicious canvas waiting for your creativity.
- Peanut Butter Swap: I’ve found that sticking to creamy commercial peanut butter like Jif or Skippy keeps the center nice and smooth. Natural or crunchy peanut butter tends to change the texture, making it less gooey and more crumbly, which isn’t the lava cake experience we’re after.
- Plain Chocolate Version: Sometimes, less is more! If you’re in the mood for the classic molten chocolate cake without the peanut butter, just skip adding it and bake as usual. You’ll still get that gorgeous molten center that’s rich and satisfying.
- Muffin Pan Alternative: Don’t have ramekins? No worries! Grease and dust a muffin pan with cocoa powder and bake at the same temperature for about 10 minutes. You’ll get six smaller cakes that are just as indulgent.
- Serving Suggestions: I love topping mine with a scoop of vanilla ice cream and drizzling melted peanut butter or chocolate syrup for an extra-special touch. It’s simple but feels so decadent!
Step-by-Step: How I Make Peanut Butter Chocolate Lava Cakes Recipe
Step 1: Prep Your Ramekins for Easy Release
Start by spraying four 6-ounce ramekins generously with nonstick cooking spray. Then, dust them with cocoa powder. This step is a small investment of time but a huge payoff — it ensures your lava cakes will pop out cleanly after baking without any sticking or tearing.
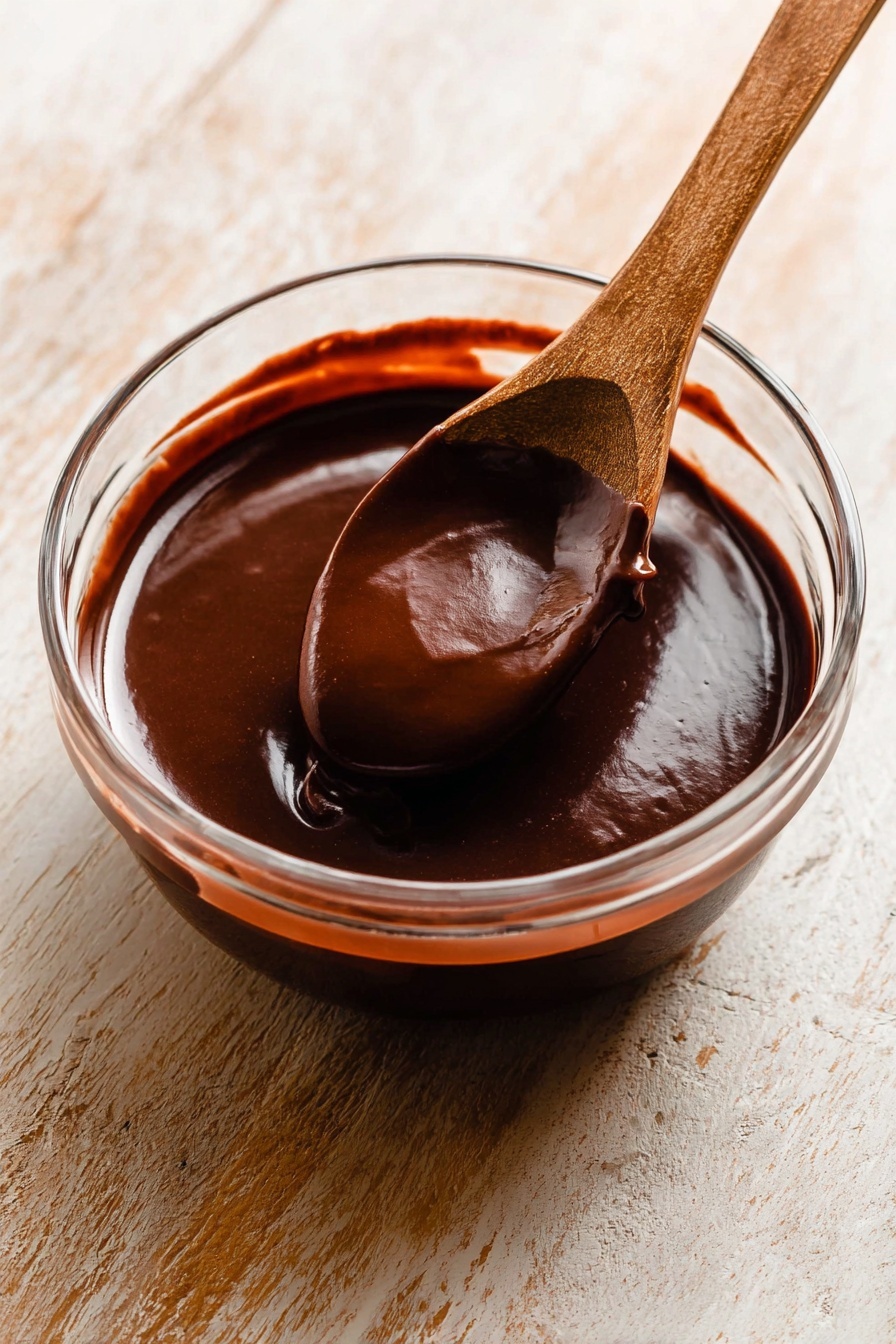
Step 2: Melt Your Chocolate and Butter to Velvety Perfection
Coarsely chop 6 ounces of semi-sweet chocolate and place it in a medium heatproof bowl with ½ cup unsalted butter. Microwave on high in short 10-second intervals, stirring after each one. The key is patience here — you want to melt everything slowly so the butter and chocolate combine into a glossy, smooth mixture without overheating. Once smooth, set it aside to cool slightly before moving on.
Step 3: Whisk Together Your Dry and Egg Ingredients
In a small bowl, whisk together ¼ cup all-purpose flour, ½ cup confectioners’ sugar, and ⅛ teaspoon salt. In another bowl, whisk 2 large eggs with 2 large egg yolks until well blended. This preparation keeps everything ready to smoothly combine with your melted chocolate.
Step 4: Blend Flour and Eggs Into the Chocolate Base
Slowly add the dry flour mixture into your melted chocolate, followed by the whisked eggs. Use a silicone spatula or wooden spoon to fold everything together gently until the batter is smooth and slightly thickened. If you spot a few lumps, a gentle whisk will help smooth them out. The batter should look silky and luscious, ready to promise that molten center.
Step 5: Fill the Ramekins and Add Your Peanut Butter Center
Divide the chocolate batter evenly among your prepared ramekins. Next, dollop 2 teaspoons of creamy peanut butter on top of each and press gently just a little so it sinks evenly but some peanut butter still remains visible on the surface. This little trick creates pockets of gooey peanut butter that melt delightfully inside when baked.
Step 6: Bake Until Just Set and Serve Warm
Place your ramekins on a baking sheet and pop them into a 425°F (218°C) oven for 13 minutes. You’ll know they’re ready when the edges look firm and solid but the centers still have a slight wobble. After baking, let them rest for just 1 minute — then carefully invert each ramekin onto a plate using oven mitts (they’ll be hot!) to reveal your molten masterpiece.
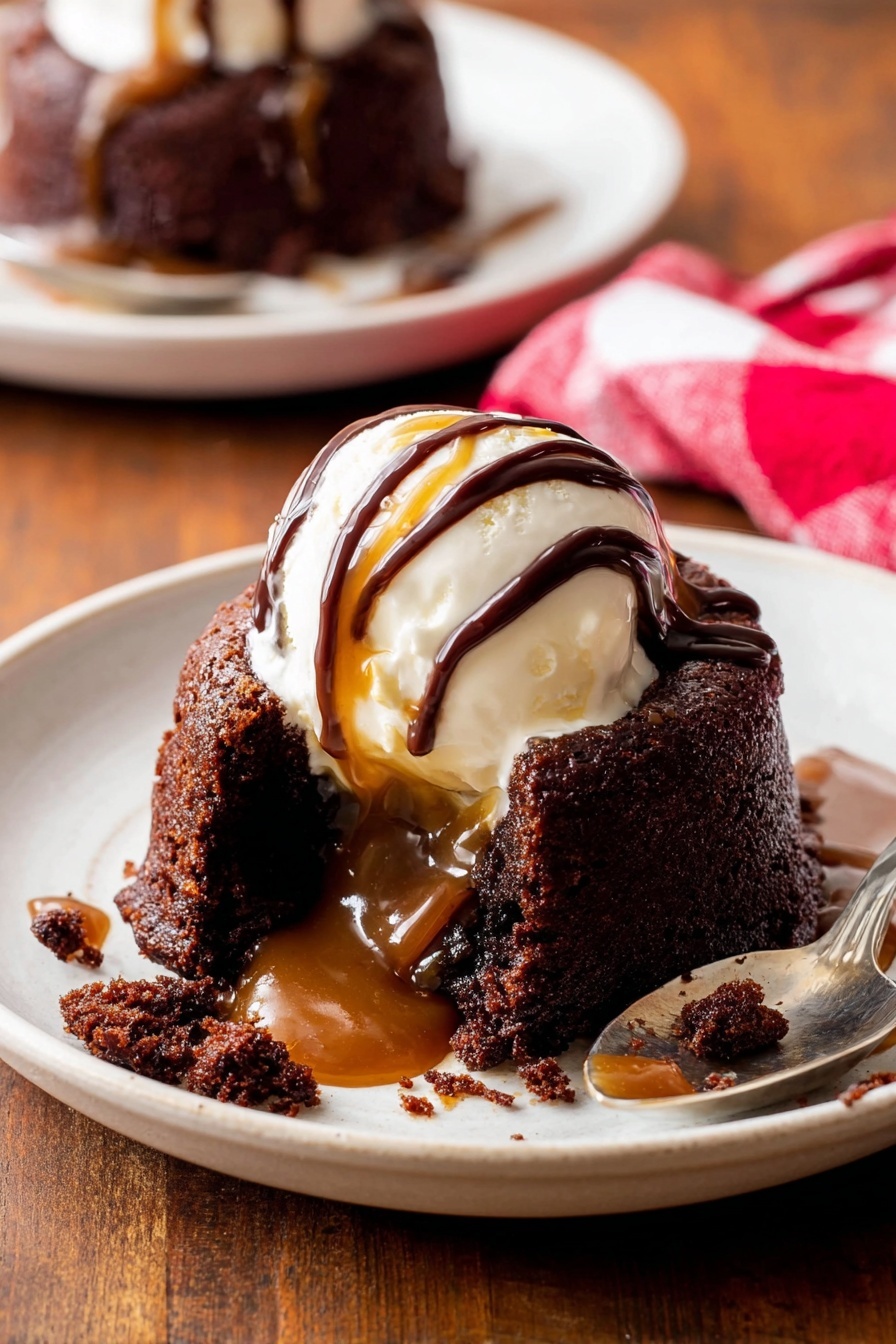
Step 7: Dress It Up and Dig In!
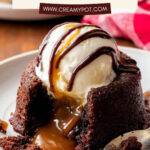
Serve immediately with a scoop of ice cream or drizzle with melted peanut butter and chocolate syrup. The contrast of hot, gooey lava cake with cold, creamy ice cream is absolutely heavenly — and the peanut butter adds a nutty richness that takes these cakes to the next level.
Top Tip
These little cakes are as much about timing and technique as they are about ingredients. Following a few key tips will help your Peanut Butter Chocolate Lava Cakes Recipe turn out flawlessly molten and utterly delicious every time.
- Perfect Ramekin Prep: I always spray my ramekins generously and then dust them with cocoa powder. It’s a game changer for easy release—no sticky cake disasters here!
- Peanut Butter Choice Matters: I learned the hard way that creamy commercial peanut butter brands like Jif or Skippy work best. Natural or crunchy types can affect the texture and bake unpredictably.
- Don’t Overbake: Baking for the full 13 minutes until the edges are set but the center still jiggles slightly is my secret to that glorious molten core.
- Gentle Mixing: When combining your batter, stir slowly and smoothly to avoid over-incorporating air—and gently whisk out any lumps without toughening the batter.
How to Serve Peanut Butter Chocolate Lava Cakes Recipe
Garnishes
I love topping these lava cakes with a scoop of vanilla ice cream for that hot-and-cold contrast. A drizzle of melted peanut butter or chocolate syrup adds an extra layer of indulgence and highlights the rich peanut-chocolate combo perfectly. For a fresh twist, sprinkle some chopped roasted peanuts or a pinch of flaky sea salt on top to balance the sweetness.
Side Dishes
Keep sides light and simple to let these decadent cakes shine. Fresh berries like raspberries or strawberries bring a lovely tart brightness alongside the rich chocolate and peanut butter. A small fruit salad or a crisp green salad with citrus vinaigrette works beautifully if you’re serving this after a hearty meal.
Make Ahead and Storage
Storing Leftovers
If you happen to have any leftover lava cakes (which is rare!), store them in an airtight container in the refrigerator for up to 2 days to keep them fresh and moist.
Freezing
These cakes freeze well for future indulgence! After baking and cooling completely, wrap each cake tightly in plastic wrap and then foil. Freeze for up to 1 month. When you’re ready to enjoy, thaw in the refrigerator overnight before reheating.
Reheating
To reheat, place the cake on a microwave-safe plate and warm on medium power for about 20-30 seconds, checking to make sure the center is warm but not overcooked. The goal is to revive that molten center without drying out the cake. Serve immediately with your favorite toppings.
Frequently Asked Questions:
Absolutely! Simply omit the peanut butter topping and bake for the same 12-13 minutes. You'll get a classic molten chocolate lava cake that's just as delightful.
Use a creamy commercial peanut butter like Jif or Skippy. Avoid natural or crunchy peanut butters as they can affect the texture and baking outcome.
Yes! You can prepare the batter through the mixing step, cover it tightly, and refrigerate for up to 1 day. Just bring it back to room temperature before baking.
No problem. You can use a greased and cocoa-dusted muffin pan to bake six smaller lava cakes at 425°F (218°C) for about 8-10 minutes.
Final Thoughts
Making these Peanut Butter Chocolate Lava Cakes brings such a joyful mix of ease and indulgence to the kitchen. There’s something magical about that molten chocolate and peanut butter center that makes any occasion feel special. I hope this recipe becomes your go-to when you want a quick yet impressive dessert that tastes like pure love. Enjoy every warm, gooey bite!
Print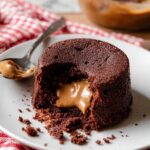
Peanut Butter Chocolate Lava Cakes Recipe
- Prep Time: 15 minutes
- Cook Time: 13 minutes
- Total Time: 35 minutes
- Yield: 4 cakes
- Category: Dessert
- Method: Baking
- Cuisine: American
- Diet: Vegetarian
Description
Indulge in these rich and decadent Peanut Butter Chocolate Lava Cakes, combining smooth semi-sweet chocolate with creamy peanut butter to create a molten center that's pure heaven. Perfect for a special dessert, these individual cakes are easy to prepare and bake to perfection in about 35 minutes.
Ingredients
Main Ingredients
- 6 ounces semi-sweet chocolate (such as Ghirardelli or Lindt), chopped
- ½ cup unsalted butter (8 tablespoons; 113 grams)
- ¼ cup all-purpose flour (31 grams; spooned & leveled)
- ½ cup confectioners’ sugar (60 grams)
- ⅛ teaspoon salt
- 2 large eggs
- 2 large egg yolks
- 8 teaspoons creamy peanut butter (42 grams; about 2 teaspoons per cake)
Optional for Serving
- Ice cream
- Melted peanut butter
- Chocolate syrup
Instructions
- Prepare Ramekins: Spray four 6-ounce ramekins with nonstick cooking spray and dust with cocoa powder to ensure easy cake removal after baking.
- Preheat Oven: Set the oven temperature to 425°F (218°C) to get ready for baking.
- Melt Chocolate and Butter: Coarsely chop the chocolate and place it in a medium heat-proof bowl with the butter. Microwave on high in 10-second intervals, stirring after each, until the mixture is completely smooth. Set aside to cool slightly.
- Combine Dry Ingredients: In a small bowl, whisk together the flour, confectioners’ sugar, and salt.
- Combine Eggs: In another small bowl, whisk together the whole eggs and egg yolks until fully blended.
- Mix Batter: Slowly add the flour mixture and then the eggs into the melted chocolate bowl. Gently stir using a silicone spatula or wooden spoon until smooth and slightly thick without lumps. Use a whisk gently if needed to eliminate any lumps.
- Fill Ramekins: Spoon the chocolate batter evenly into each prepared ramekin. Top each with 2 teaspoons of creamy peanut butter, pressing it slightly into the batter. Some peanut butter may remain exposed on top.
- Bake Cakes: Place ramekins on a baking sheet and bake for 13 minutes or until the sides appear solid while the centers remain slightly soft.
- Invert and Serve: Let the cakes cool for 1 minute, then cover each ramekin with an inverted plate and carefully flip. Use oven mitts as ramekins will be hot. The cakes should release easily. Serve immediately with optional ice cream, melted peanut butter, or chocolate syrup.
Notes
- This batter can be prepared through mixing step and refrigerated tightly covered for up to 1 day; bring to room temperature before baking.
- Use commercial creamy peanut butter brands like Jif or Skippy; avoid natural or crunchy peanut butters and other nut butters.
- For plain lava cakes without peanut butter, omit it and bake for the same 12-13 minutes.
- Use standard 6-ounce ramekins for best results; alternatively, a greased and cocoa-dusted muffin pan can be used for 6 smaller cakes baked at 425°F for 10 minutes.
- Nonstick spray and cocoa powder dusting prevent sticking and enable easy cake release.
Nutrition
- Serving Size: 1 cake
- Calories: 420 kcal
- Sugar: 32 g
- Sodium: 110 mg
- Fat: 28 g
- Saturated Fat: 12 g
- Unsaturated Fat: 14 g
- Trans Fat: 0 g
- Carbohydrates: 38 g
- Fiber: 4 g
- Protein: 7 g
- Cholesterol: 135 mg

Leave a Reply