There’s something truly magical about biting into a crisp, cool chocolate cookie with that unmistakable minty zing. This Homemade Thin Mint Cookies Recipe captures that perfect balance of flavors and textures that make it so special—plus, you get the joy of making them from scratch, which is way more satisfying than store-bought!

Jump to:
Why You'll Love This Recipe
I’ve been making these homemade thin mint cookies for years now, and every batch reminds me why it’s worth the effort. They bring together rich cocoa, cool peppermint, and that delicate crunch you just don’t get anywhere else. It’s like tasting a classic treat with your own twist.
- Authentic Flavor: Peppermint extract truly shines here, giving the cookies a refreshing minty punch that balances the chocolate perfectly.
- Perfect Texture: Crispy edges with a tender center make every bite satisfying without being too hard or crumbly.
- Customizable Chocolate Coating: Dipping the cookies in melted chocolate lets you control sweetness and richness to your liking.
- Great for Making Ahead: The dough chills beautifully, and these cookies freeze well, so you can enjoy them anytime.
Ingredients & Why They Work
This Homemade Thin Mint Cookies Recipe uses simple, pantry-friendly ingredients that come together to create that classic chocolaty-mint combo. Knowing the role of each ingredient makes it easier to nail the texture and flavor.
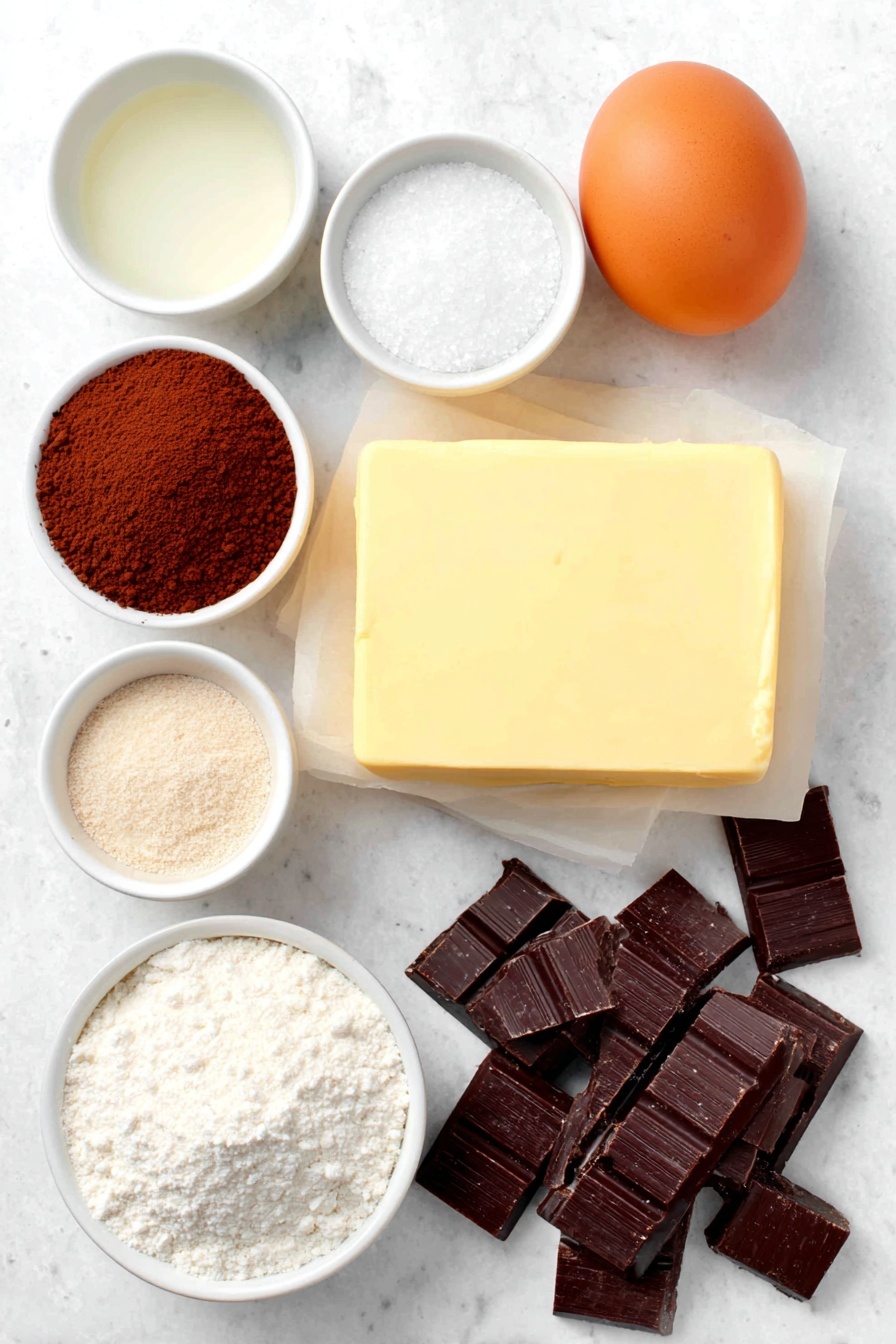
- Unsalted Butter: Room temperature butter ensures a creamy base that traps air, resulting in light, fluffy dough.
- Granulated Sugar: Sweetens the cookie and helps with the crisp edge texture you want.
- Egg: Adds moisture and helps bind the dough so it holds together when baking.
- Pure Vanilla Extract: Rounds out the flavors adding warmth underneath all that mint and cocoa.
- Peppermint Extract: The star of the show—use real peppermint, not spearmint—to get that icy cool freshness.
- All-Purpose Flour: Provides structure; spoon and level it for a consistent, tender crumb.
- Cocoa Powder: Natural or Dutch-process cocoa boosts chocolate flavor; I prefer unsweetened natural cocoa for its bright depth.
- Baking Powder: Adds a little lift so cookies aren’t flat and dense.
- Salt: Enhances all the other flavors and balances the sweetness.
- Semi-Sweet Chocolate & Oil: Melting these together creates that luxuriously smooth coating that sets up with a lovely snap.
Make It Your Way
While I love the classic recipe as is, I often tweak it depending on the occasion or what I have on hand. Adding a hint of espresso powder or swapping semi-sweet for dark chocolate can totally elevate the flavor and make the cookies your own.
- Variation: I like to swirl a little orange zest into the dough sometimes—it gives a surprising citrus twist that pairs beautifully with mint and chocolate.
- Dietary tweaks: For gluten-free friends, swapping in a 1:1 gluten-free flour blend works well, just be sure to chill the dough longer for easier cutting.
- Slice ‘n’ Bake Option: I’ve tried rolling the dough into logs chilled for slicing — it saves time without sacrificing that perfect texture.
Step-by-Step: How I Make Homemade Thin Mint Cookies Recipe
Step 1: Cream the Butter and Sugar Until Fluffy
Start by beating the softened butter on medium speed for about a minute until it’s silky and smooth. Then add the sugar, raising the mixer speed to medium-high, and beat until the mixture lightens in color and becomes fluffy—this aerates the batter, which helps the cookies rise just right.
Step 2: Add Egg and Extracts
Next, beat in the egg along with vanilla and peppermint extracts. Don’t skip on peppermint extract—it’s what gives these cookies their signature cool flavor. Remember to scrape down the bowl a few times here to make sure everything’s evenly mixed.
Step 3: Combine Dry Ingredients and Fold In
Sift together flour, cocoa powder, baking powder, and salt in a separate bowl. This prevents clumps and ensures an even chocolate flavor. On low speed, add these dry ingredients slowly to the wet mixture, mixing just until combined—overmixing can make the cookies tough.
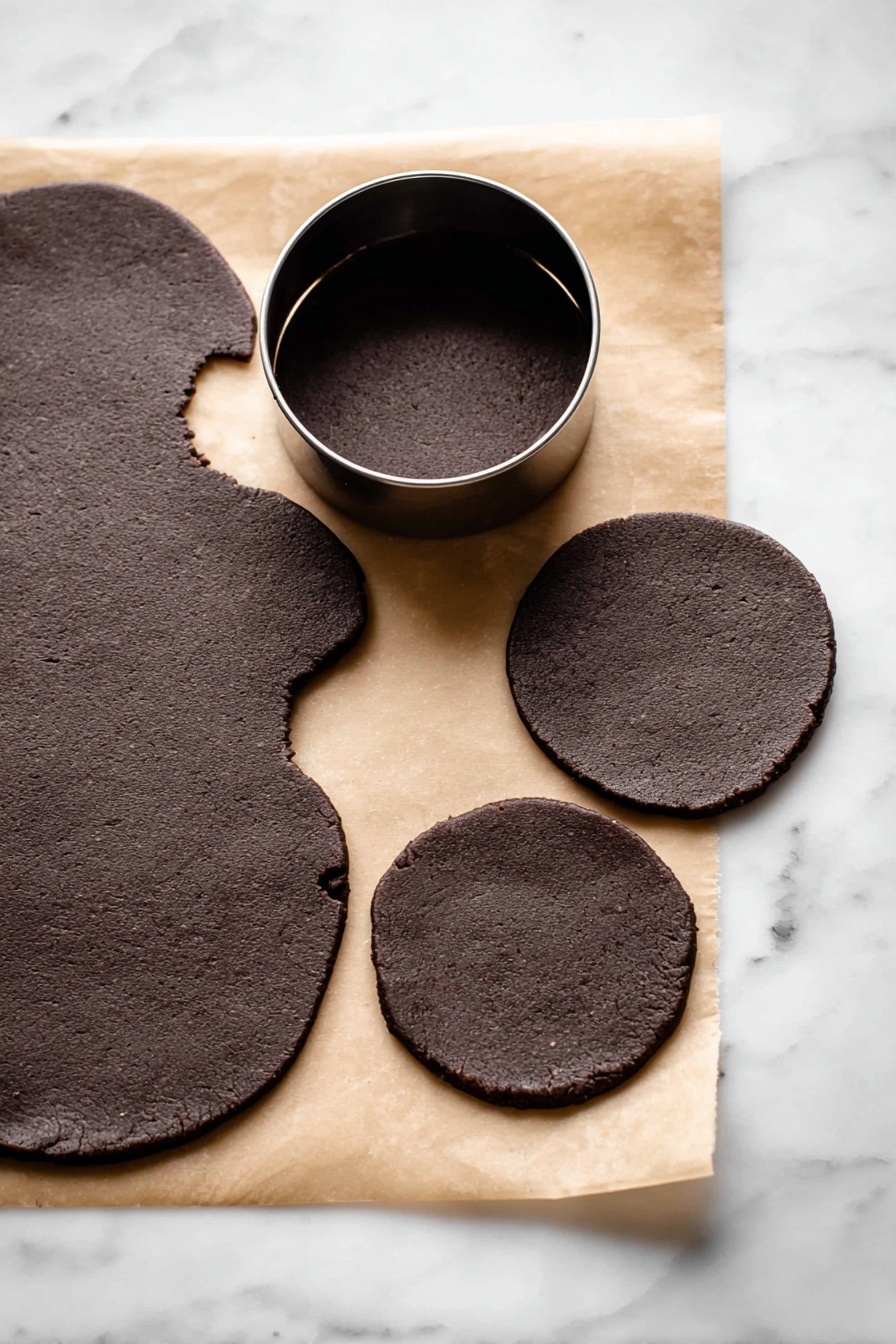
Step 4: Chill and Roll Out the Dough
Divide the dough into two portions and roll each out to about ¼ inch thickness on parchment paper. Stack them with parchment between and refrigerate for at least an hour. This step is mandatory—it firms up the dough, making it easier to cut and helps maintain their shape during baking.
Step 5: Cut, Bake, and Cool
Preheat your oven to 350°F (177°C). Use a 2-inch round cutter to cut cookies from the dough and place them on lined baking sheets. Don’t forget to rotate the pans halfway through baking for even cooking. They’ll look soft when you pull them out—that’s perfect! Let them cool completely on racks before the next step.
Step 6: Dip in Chocolate and Chill
Melt the chopped chocolate with a little oil (it makes the coating silky and easier to dip). Stir in peppermint extract for a final minty kick. Then, dunk each cookie fully in the chocolate, letting excess drip off before setting them on parchment to chill until the chocolate hardens.
Top Tip
From my trials making this recipe, a couple of thoughtful tweaks go a long way in achieving those picture-perfect Homemade Thin Mint Cookies.
- Use Real Peppermint Extract: Mint extract can taste like toothpaste—peppermint extract yields a natural cool, fresh flavor that's essential here.
- Chill, Chill, Chill: Don’t skimp on chilling the dough—it keeps your cut-outs clean and prevents spreading during baking.
- Rotate Your Baking Sheets: Ovens can have hot spots; turning your trays halfway ensures evenly baked cookies every time.
- Melt Chocolate Gently: Whether using microwave or double boiler, patience is key to a smooth, silky chocolate coating without burning.
How to Serve Homemade Thin Mint Cookies Recipe

Garnishes
I usually keep garnishes simple—just a sprinkle of crushed peppermint candy or even a few fine sea salt flakes right after dipping in chocolate adds a lovely festive touch and enhances flavor contrast. It’s an easy way to elevate presentation without overwhelming the cookies.
Side Dishes
These cookies are naturally a fantastic treat on their own, but I love pairing them with a glass of cold milk or even a steamy cup of hot cocoa on chilly days. They also hold up well alongside a peppermint-flavored coffee or peppermint tea for a full minty experience.
Creative Ways to Present
For holiday gatherings or parties, I like arranging the cookies stacked in little towers or wrapped individually with a festive ribbon. Another idea I tried was placing them in clear jars layered with crushed candy canes—for a pretty edible gift that’s so fun to give and get.
Make Ahead and Storage
Storing Leftovers
Store your Homemade Thin Mint Cookies in an airtight container at room temperature, and they’ll stay fresh for about 2-3 days—though they rarely last that long in my house! For longer storage, the fridge is fine for up to a week, especially if you prefer chilled cookies.
Freezing
I freeze leftover cookies all the time, especially before holidays. Pop them into freezer-safe containers, and they keep well for up to 3 months. When I want to enjoy one, I just thaw them in the fridge overnight or eat straight from the freezer for a delightful icy crunch.
Reheating
If you warm them up a bit, I suggest a quick 10-second zap in the microwave just to take the chill off—don’t overdo it or the chocolate may soften too much. Alternatively, leave them at room temp for 15-20 minutes to regain that fresh-baked feel.
Frequently Asked Questions:
While mint extract sounds like a good substitute, it often has a strong spearmint flavor that can resemble toothpaste. Peppermint extract has that crisp, cooling flavor which pairs perfectly with chocolate in these cookies.
Chilling the dough for at least 1 hour is mandatory to help the cookies hold their shape and achieve the right texture. You can chill it for up to 2 days; just keep the dough covered to prevent drying out.
Yes! You can roll the dough into two 2-3 inch logs, chill for at least 1 hour, then slice into 16-18 cookies per log. This saves time on rolling and cutting, but because the dough is a bit sticky, chilling well is key.
Using a double boiler allows gentle melting, minimizing the risk of burning the chocolate. If using a microwave, heat in short 15-second bursts, stirring in between, until smooth. Adding a bit of oil helps achieve a silky coating easier to work with.
Final Thoughts
Making this Homemade Thin Mint Cookies Recipe has become a little tradition for me during cozy weekends and holidays. The smell of cocoa and peppermint filling my kitchen and sharing the cookies with friends always brings a smile. Trust me, once you try making these yourself, you’ll rediscover how much more rewarding a homemade cookie can be—you’re not just baking, you’re creating a little magic.
Print
Homemade Thin Mint Cookies Recipe
- Prep Time: 2 hours 15 minutes
- Cook Time: 10 minutes
- Total Time: 3 hours 15 minutes
- Yield: 36 cookies
- Category: Dessert
- Method: Baking
- Cuisine: American
- Diet: Vegetarian
Description
Delicious homemade Thin Mint Cookies featuring a rich chocolate and peppermint flavored dough dipped in smooth semi-sweet chocolate. These classic cookies are perfect for holiday treats or anytime you crave a refreshing chocolate-mint dessert.
Ingredients
Cookie Dough
- ¾ cup unsalted butter, softened to room temperature
- 1 cup granulated sugar
- 1 large egg, at room temperature
- 1 teaspoon pure vanilla extract
- ¼ teaspoon peppermint extract
- 1 and ½ cups all-purpose flour (spooned & leveled)
- ¾ cup unsweetened natural cocoa powder (or dutch process)
- 1 teaspoon baking powder
- ⅛ teaspoon salt
Topping
- 14 ounces quality semi-sweet chocolate, coarsely chopped
- ½ teaspoon canola or vegetable oil
- ¼ teaspoon peppermint extract
Instructions
- Prepare Butter and Sugar: In a large bowl using a handheld or stand mixer fitted with a paddle attachment, beat the softened butter for 1 minute on medium speed until smooth and creamy. Add granulated sugar and beat on medium-high speed until the mixture is fluffy and light in color.
- Add Wet Ingredients: Beat in the egg, vanilla extract, and peppermint extract on high speed until fully combined. Scrape down the sides and bottom of the bowl as needed.
- Combine Dry Ingredients: Sift the flour and cocoa powder together in a medium bowl. Whisk in baking powder and salt until evenly mixed.
- Mix Dry Into Wet: On low speed, slowly add the dry ingredients to the wet ingredients and mix until combined, forming the cookie dough.
- Chill the Dough: Divide the dough into two equal portions. Roll each onto parchment paper to about ¼-inch thickness. Stack the rolled dough with parchment between layers on a baking sheet and refrigerate for at least 1 hour. Cover with parchment if chilling more than a couple of hours. Can chill up to 2 days.
- Preheat Oven and Prepare Baking Sheets: Once chilled, preheat the oven to 350°F (177°C). Line 2-3 large baking sheets with parchment paper or silicone mats.
- Cut Cookies: Remove one dough piece from the fridge and cut into 2-inch circles using a cookie cutter. Transfer cut cookies to the prepared baking sheets. Re-roll scraps and continue cutting until all dough is used.
- Bake Cookies: Bake for 10 minutes or until edges appear set. Rotate baking sheets halfway through. Cookies will be soft in centers.
- Cool Cookies: Let cookies cool on the baking sheet for 5 minutes, then transfer to a wire rack to cool completely before dipping.
- Melt Chocolate Topping: Melt chopped chocolate and oil together in a double boiler or microwave in 15-second increments, stirring after each until smooth. Stir in peppermint extract.
- Dip and Set Cookies: Dip each cooled cookie fully into the melted chocolate using a fork, allow excess chocolate to drip off tapping on bowl edge. Place dipped cookies on parchment or silicone mat-lined baking sheet and refrigerate until chocolate sets.
- Store Cookies: Store leftover cookies covered at room temperature for 2-3 days or refrigerate for up to 1 week. Cookies also taste great frozen.
Notes
- Cookies freeze well for up to 3 months; thaw overnight in refrigerator before serving.
- Dough can be chilled for up to 2 days before baking.
- Cookie dough can be frozen before rolling for up to 3 months; thaw overnight and bring to room temperature before rolling.
- Avoid mint extract; peppermint extract pairs best with chocolate for authentic flavor.
- For a slice-and-bake option, shape dough into 2-3 inch logs, chill for 1 hour, then slice into 16-18 cookies before baking.
- Use electric mixer with paddle attachment, rolling pin, cookie cutters, baking sheets, parchment paper, silicone mats, cooling rack, and double boiler or microwave-safe bowl for best results.
Nutrition
- Serving Size: 1 cookie
- Calories: 150 kcal
- Sugar: 13 g
- Sodium: 55 mg
- Fat: 9 g
- Saturated Fat: 5 g
- Unsaturated Fat: 3 g
- Trans Fat: 0 g
- Carbohydrates: 16 g
- Fiber: 2 g
- Protein: 2 g
- Cholesterol: 20 mg


Leave a Reply