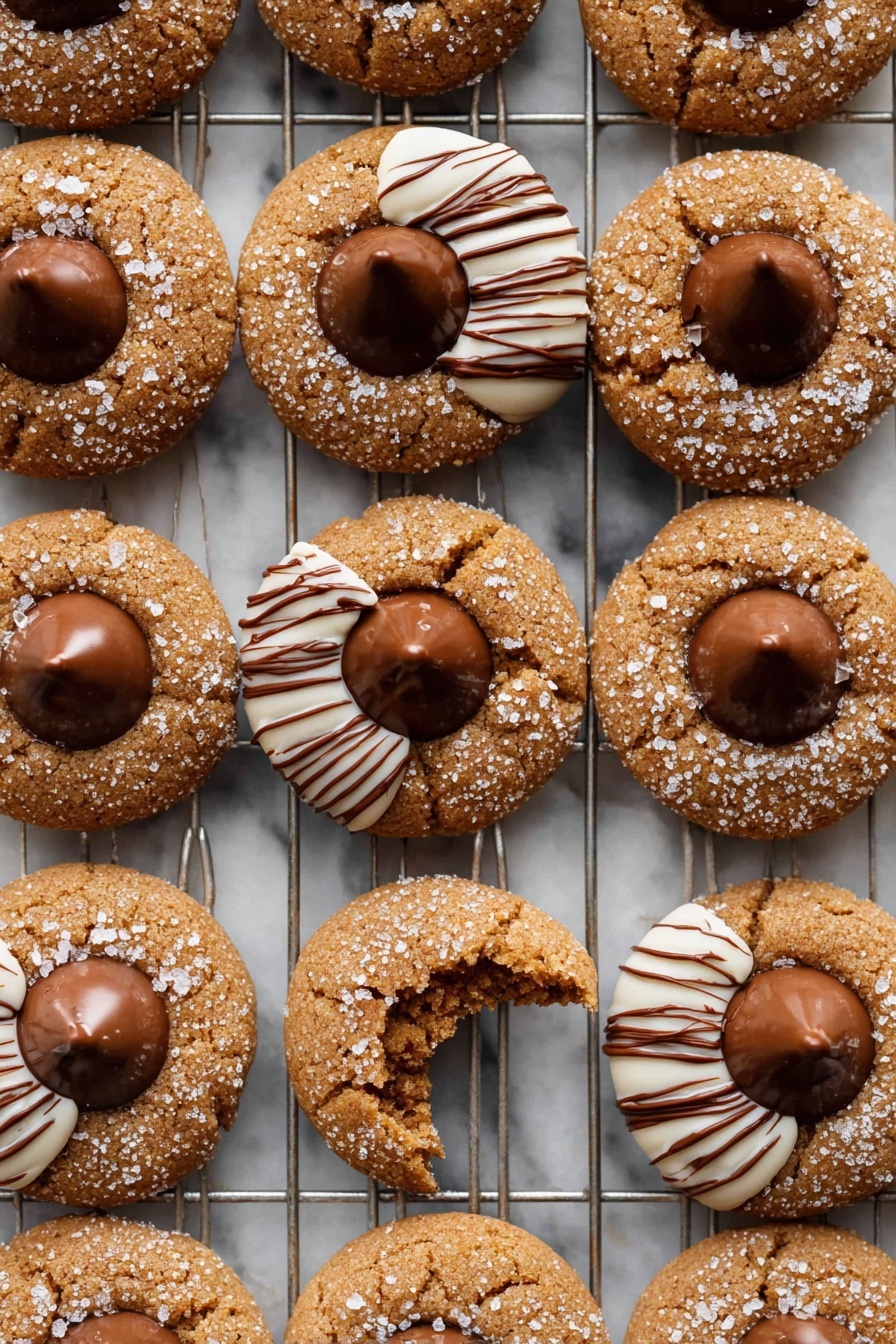
There’s something so comforting about the warm spices and cozy aroma of this Gingerbread Blossoms with Chocolate Kisses Recipe. These little cookies have become a holiday favorite in my kitchen, combining that classic gingerbread taste with a melty chocolate center that feels like a sweet little surprise in every bite.

Jump to:
- Why You'll Love This Recipe
- Ingredients & Why They Work
- Make It Your Way
- Step-by-Step: How I Make Gingerbread Blossoms with Chocolate Kisses Recipe
- Top Tip
- How to Serve Gingerbread Blossoms with Chocolate Kisses Recipe
- Make Ahead and Storage
- Frequently Asked Questions:
- Final Thoughts
- Gingerbread Blossoms with Chocolate Kisses Recipe
Why You'll Love This Recipe
What makes this Gingerbread Blossoms with Chocolate Kisses Recipe truly special (and why I keep coming back to it every winter) is how it balances nostalgic flavors with easy, foolproof steps. Plus, those shiny chocolate kisses nestled right in the center add a bit of whimsy and indulgence that makes these cookies a crowd-pleaser.
- Perfect Holiday Treat: The warm blend of spices instantly brings that festive vibe to your kitchen.
- Melty Chocolate Surprise: Pressing a chocolate kiss on top gives you a melty, gooey center that’s irresistible.
- Simple Enough for Beginners: Even if you’re new to baking, these cookies are straightforward with clear steps.
- Customizable & Fun: You can easily swap chocolates or tweak the spices to match your taste or occasion.
Ingredients & Why They Work
The magic of this Gingerbread Blossoms with Chocolate Kisses Recipe starts with the right mix of spices and ingredients that create that warm gingerbread flavor and perfect chewy texture. I always recommend using real molasses – it really deepens the flavor beyond just brown sugar.
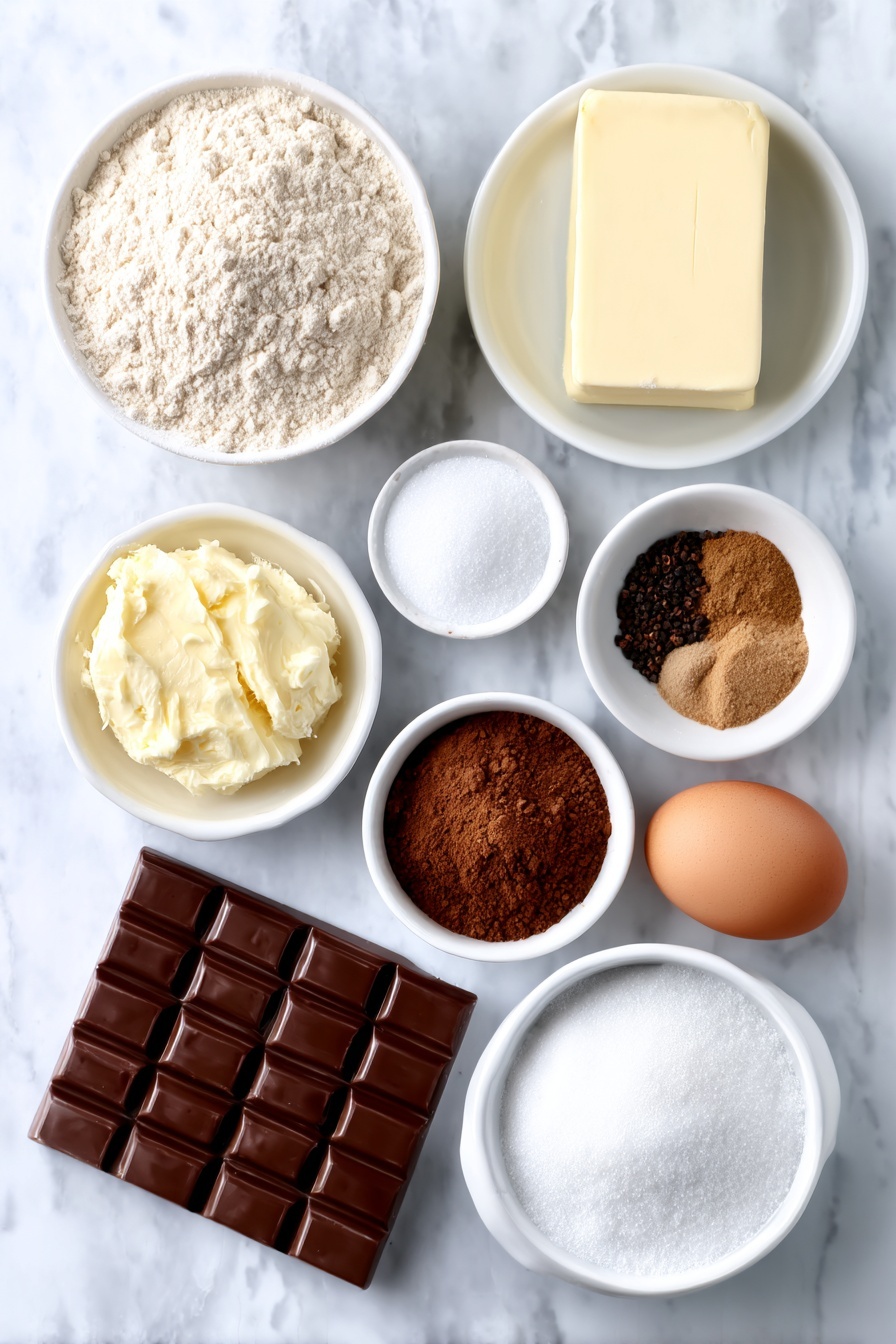
- All-purpose flour: The base of your dough, giving structure without weighing the cookies down.
- Baking soda: Helps the cookies rise and creates that tender crumb.
- Ground ginger, cinnamon, cloves, allspice, nutmeg: This spice combo is classic gingerbread territory – aromatic and warming.
- Salt: Enhances the spices and balances sweetness.
- Unsalted butter: Adds rich flavor and tenderness; soften to room temp for best creaming.
- Brown sugar: I prefer dark brown sugar here for a bolder caramel note.
- Molasses: The star of gingerbread – makes the dough moist and flavorful (avoid blackstrap for a milder taste).
- Egg: Binds everything together and adds moisture.
- Vanilla extract: Rounds out flavor and adds a subtle sweetness.
- Granulated or coarse sparkling sugar: For rolling the cookie dough balls – coarse sugar adds crunch and sparkle.
- Chocolate Kisses or Hugs: My favorite finishing touch for that melty, chocolate center.
Make It Your Way
I’ve played around with this Gingerbread Blossoms with Chocolate Kisses Recipe enough to know there’s always room to make it your own. Whether you love a spicier bite or want to experiment with different chocolates, these cookies invite customization.
- Chocolate Variations: I sometimes swap milk chocolate kisses for white chocolate hugs, but remember the freeze step to prevent melting too fast! Dark chocolate chips pressed in the center also work well for a richer flavor.
- Spice It Up: Adding a pinch more ginger or cinnamon can turn these into a powerhouse of warmth if you crave a stronger spice note.
- Sugar Coating: For a festive touch, try rolling dough balls in colored coarse sugar before baking – it adds a pop of color and crunch.
- Make It Vegan: I haven’t tested this myself fully, but swapping butter for a vegan alternative and using a flax egg could be a fun experiment if that’s your jam.
Step-by-Step: How I Make Gingerbread Blossoms with Chocolate Kisses Recipe
Step 1: Prep Your Ingredients and Oven
Start by preheating your oven to 350°F (177°C). Line your baking sheets with parchment paper or silicone mats to keep the cookies from sticking — it really makes clean-up easier too. Then, whisk together all your dry ingredients: the flour, baking soda, and all those beautiful spices. Getting this mix ready ahead keeps you smooth in the next steps.
Step 2: Cream Butter and Sugar
In a large bowl, beat that softened butter with your brown sugar until it’s creamy and fluffy — usually about 3 minutes on medium-high speed if you’re using a mixer. This step is key because you want the sugar to dissolve a bit and the butter to really lighten up. If you’re new to creaming, don’t worry! Just beat until the texture is smooth and pale.
Step 3: Incorporate Molasses, Egg & Vanilla
Add in your molasses, egg, and vanilla extract, then beat again until everything blends together well. It might look a bit curdled or separated at this point — that’s totally normal, so don’t stress! Just scrape down the sides to make sure everything mixes evenly.
Step 4: Mix in Dry Ingredients
Now, slowly add your dry flour and spice mixture to the wet mix on low speed. The dough will get fairly thick and a bit sticky, which is what you want for chewy cookies. Overmixing here can toughen the dough, so just mix until combined and no dry flour streaks remain.
Step 5: Roll, Sugar-Cover, and Bake
Scoop out about 1.5 tablespoons of dough for each cookie — I use a cookie scoop to keep them uniform. Roll each ball in granulated or sparkling coarse sugar to add a pretty crunch and sparkle on top. Place them on your baking sheets spaced at least 2 inches apart because they spread a bit. Bake for 12 minutes or until the edges look set but the centers are still soft.
Step 6: Add Chocolate Kisses and Freeze
Right after you take the cookies out, let them cool on the sheet for five minutes. Then, transfer them carefully onto a tray or plate that fits your freezer. Press a chocolate kiss into the center while the cookie is still warm — it’ll soften the chocolate just right. Pop the tray into the freezer for about 10 minutes to quickly set the chocolate, so you don’t lose that kiss shape.
Top Tip
From my many batches of this Gingerbread Blossoms with Chocolate Kisses Recipe, a few tips have truly saved my sanity and made the cookies come out perfect every time.
- Softened Butter is Key: Make sure your butter is at room temp before starting. Too cold and the creaming won’t work well; too warm can make the dough greasy.
- Don’t Skimp on the Freezing Step: Pressing the chocolates into warm cookies and freezing them solid helps keep the kiss shape without melting into a sad puddle.
- Coarse Sugar for Crunch: I always roll the dough in sparkling sugar instead of regular granulated – it adds a bit of texture and looks so pretty.
- Chill Dough for Convenience: You can prep the dough up to 3 days ahead and keep it chilled — it actually deepens the flavor and makes rolling easier.
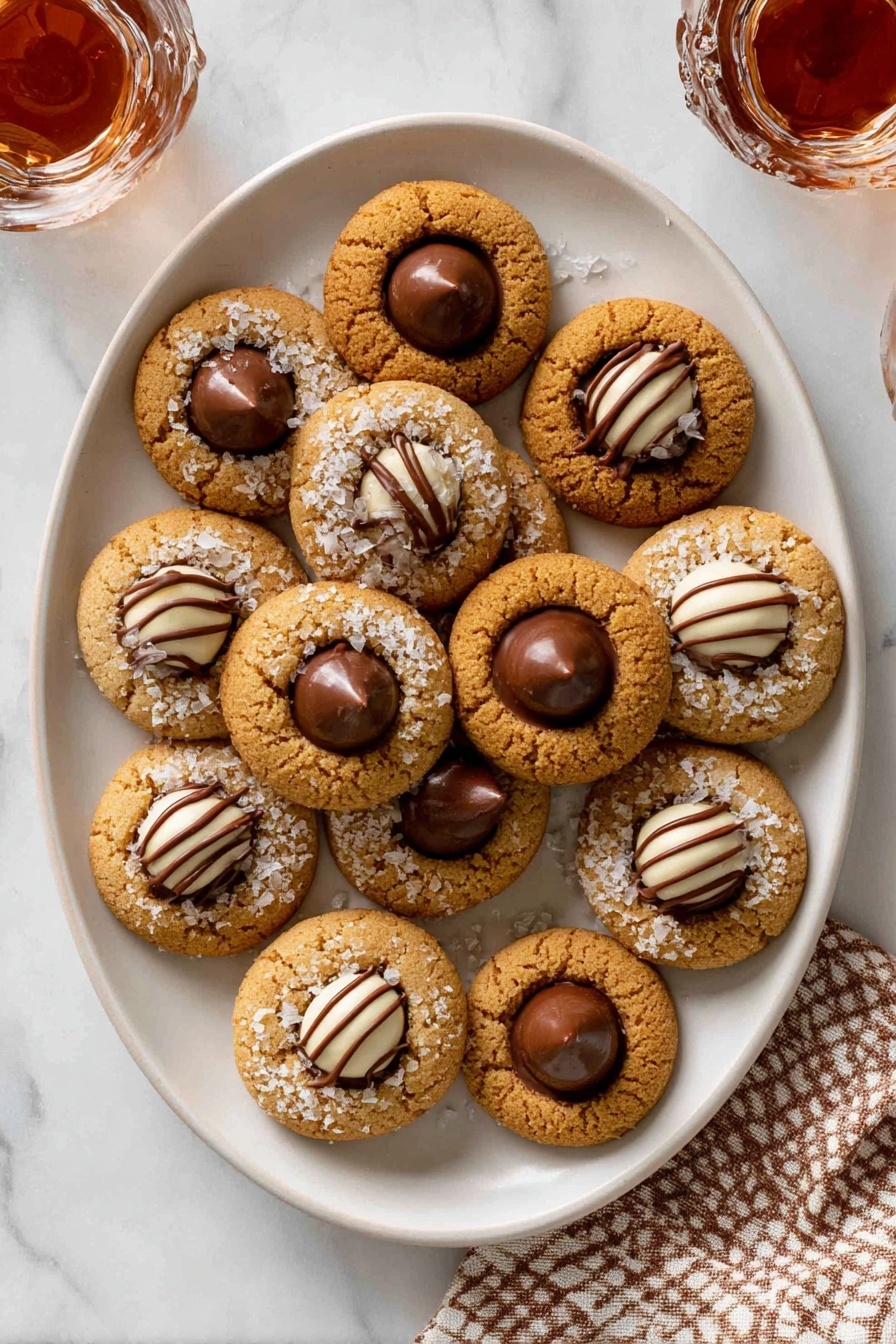
How to Serve Gingerbread Blossoms with Chocolate Kisses Recipe
Garnishes
I love sprinkling a little extra coarse sugar or edible glitter on these cookies after baking for extra sparkle during the holidays. A light dusting of powdered sugar can also make them look like little snowy gems at a winter gathering.
Side Dishes
Pair these cookies with a steaming cup of hot cocoa, spiced chai tea, or even a glass of cold milk. They’re also fantastic alongside fruitcake or spiced nuts when you want a full holiday dessert spread.
Creative Ways to Present
I once arranged a plate of these cookies on a festive platter, surrounded by fresh rosemary sprigs and dried orange slices for a natural, aromatic presentation that really wowed guests. Gift-wrapping them in cute tins or clear boxes tied with twine also makes for popular homemade holiday gifts.
Make Ahead and Storage
Storing Leftovers
I keep leftover Gingerbread Blossoms in an airtight container at room temperature, and they stay soft and flavorful for up to a week. If you notice they dry out a bit, popping one in the microwave for 10 seconds can bring back that fresh-baked softness.
Freezing
I’ve frozen both baked cookies and unbaked dough balls successfully. For the dough, I scoop and freeze balls on a tray, then transfer them to a freezer bag. When ready to bake, I bake them frozen, adding just an extra minute or two to the baking time — no thawing necessary!
Reheating
For reheating leftovers, I like to microwave a cookie for about 10-15 seconds to get that soft, melty chocolate experience back. If you’re reviving a frozen cookie, let it come to room temp first for best results.
Frequently Asked Questions:
Absolutely! You can bake the gingerbread cookies as is and skip pressing the kisses in at the end. Alternatively, you can press in chocolate chips or other small morsels to suit your preference.
Use unsulphured molasses like Grandma’s brand; it has a nice flavor without bitterness. Avoid using blackstrap molasses as it’s very strong and can overpower the cookies.
You can prepare the cookie dough and refrigerate it for up to 3 days. Just let it sit at room temperature for 30 minutes before shaping and baking for the best texture and ease of rolling.
Yes! Baked Gingerbread Blossoms freeze well for up to 3 months. Just store them in an airtight container or freezer bag, and thaw at room temperature before enjoying.
Final Thoughts
This Gingerbread Blossoms with Chocolate Kisses Recipe has become my go-to festive cookie because it’s warm, chewy, and just a little indulgent with that chocolate heart. I hope you have as much fun baking and sharing these as I have. Trust me, once you taste the first warm, chocolatey one fresh from the freezer, you’ll understand why it’s one I keep coming back to every holiday season.
Print
Gingerbread Blossoms with Chocolate Kisses Recipe
- Prep Time: 25 minutes
- Cook Time: 12 minutes
- Total Time: 45 minutes
- Yield: 30 cookies
- Category: Dessert
- Method: Baking
- Cuisine: American
- Diet: Vegetarian
Description
Gingerbread Blossoms are delightful spiced cookies featuring warm flavors of ginger, cinnamon, and molasses, topped with a classic Hershey's Kiss chocolate center. Perfectly soft and chewy with a sugary exterior crunch, these festive cookies are ideal for holiday baking and celebrations.
Ingredients
Dry Ingredients
- 3 cups (375g) all-purpose flour (spooned & leveled)
- 1 teaspoon baking soda
- 2 teaspoons ground ginger
- 1 and ¼ teaspoons ground cinnamon
- ¼ teaspoon ground cloves
- ¼ teaspoon ground allspice
- ¼ teaspoon ground nutmeg
- ¼ teaspoon salt
Wet Ingredients
- ¾ cup (12 Tbsp; 170g) unsalted butter, softened to room temperature
- ¾ cup (150g) packed light or dark brown sugar (dark preferred)
- 6 tablespoons (128g) unsulphured or dark molasses (preferably Grandma’s brand, not blackstrap)
- 1 large egg, at room temperature
- 1 teaspoon pure vanilla extract
For Rolling and Topping
- ½ cup (100g) granulated sugar or coarse sparkling sugar
- 30 Hershey’s Kisses or Hugs, unwrapped
Instructions
- Preheat and Prepare: Preheat your oven to 350°F (177°C). Line large baking sheets with parchment paper or silicone baking mats and set aside.
- Mix Dry Ingredients: In a medium bowl, whisk together the flour, baking soda, ground ginger, cinnamon, cloves, allspice, nutmeg, and salt until well combined. Set aside.
- Cream Butter and Sugar: In a large bowl, use a handheld or stand mixer with a paddle attachment to beat the softened butter and brown sugar together on medium-high speed for about 3 minutes until creamy and fully combined.
- Add Molasses, Egg, and Vanilla: Add the molasses, egg, and vanilla extract to the butter and sugar mixture. Beat on medium speed for 1 minute until everything is fully incorporated. Scrape down the sides and bottom of the bowl as needed. The mixture may look slightly curdled or separated, which is normal.
- Combine Wet and Dry Ingredients: Gradually add the flour mixture to the wet ingredients and mix on low speed until just combined. The dough will be thick and sticky.
- Scoop and Roll Dough: Using a cookie scoop or tablespoon, scoop a scant 1.5 tablespoon (about 30g) of dough and roll it into balls. Roll each ball in granulated sugar or coarse sparkling sugar until coated.
- Arrange Cookies: Place the dough balls on the prepared baking sheets, spacing them at least 2 inches apart to allow for spreading.
- Bake Cookies: Bake in the preheated oven for 12 minutes or until the edges of the cookies appear set and slightly firm.
- Cool Cookies: Remove the baking sheets from the oven and allow the cookies to cool on the sheets for 5 minutes before removing.
- Set Chocolate Centers: Transfer the cookies carefully to a smaller tray or plate that fits in your freezer. Press one unwrapped Hershey’s Kiss or Hug into the center of each warm cookie. Place the tray in the freezer for 10 minutes to quickly set the chocolate.
- Serve and Store: After chilling, remove the cookies from the freezer and serve. Store leftover cookies in an airtight container at room temperature for up to 1 week.
Notes
- You can make the dough ahead and chill it in the refrigerator for up to 3 days. Let the dough sit at room temperature for at least 30 minutes before scooping and rolling.
- Frozen baked cookies last up to 3 months; cookie dough balls can also be frozen for up to 3 months. Bake frozen dough balls without thawing, adding one extra minute to baking time.
- Use coarse sugar for rolling to add crunch and sparkle, but granulated sugar works fine.
- Regular chocolate Kisses hold their shape best; white chocolate Hugs are softer and melt faster, so quick freezing is especially important for those.
- If you prefer plain cookies without the chocolate center, simply bake as directed and skip the chocolate step, or press chocolate chips or butterscotch chips in center before baking.
- Use parchment paper or silicone mats to prevent sticking and for easier cleanup.
Nutrition
- Serving Size: 1 cookie
- Calories: 120 kcal
- Sugar: 10 g
- Sodium: 100 mg
- Fat: 6 g
- Saturated Fat: 3.5 g
- Unsaturated Fat: 2 g
- Trans Fat: 0 g
- Carbohydrates: 16 g
- Fiber: 1 g
- Protein: 1 g
- Cholesterol: 20 mg


Leave a Reply