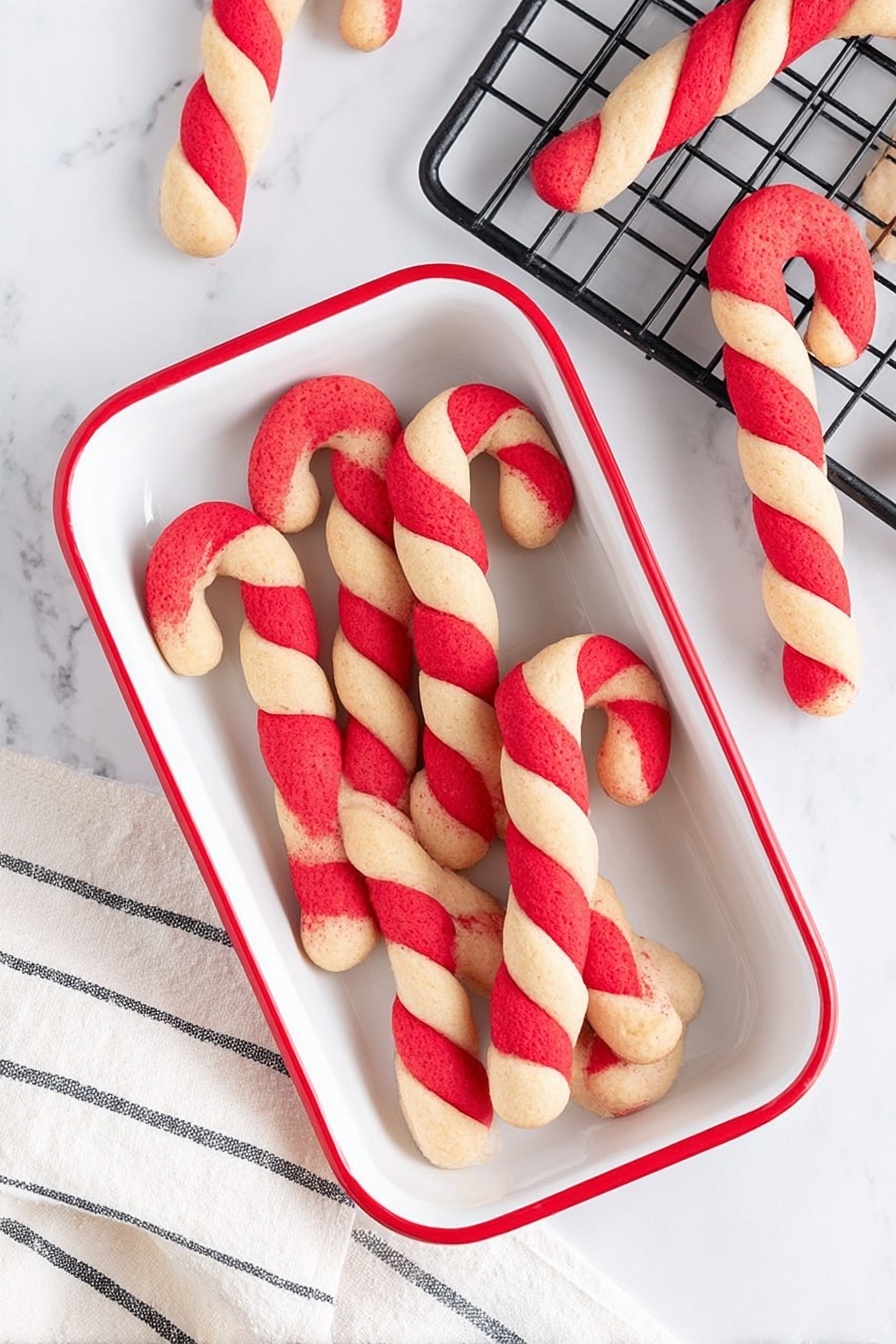
There’s just something magical about these festive treats that fill your kitchen with the refreshing aroma of peppermint. This Candy Cane Cookies with Peppermint Flavor Recipe brings that classic holiday spirit right to your countertop, perfect for sharing or savoring with a cozy cup of cocoa.

Jump to:
- Why You'll Love This Recipe
- Ingredients & Why They Work
- Make It Your Way
- Step-by-Step: How I Make Candy Cane Cookies with Peppermint Flavor Recipe
- Top Tip
- How to Serve Candy Cane Cookies with Peppermint Flavor Recipe
- Make Ahead and Storage
- Frequently Asked Questions:
- Final Thoughts
- Candy Cane Cookies with Peppermint Flavor Recipe
Why You'll Love This Recipe
I remember the first time I made these cookies—seeing the red and white dough swirl into perfect candy canes always felt like a little holiday magic right in my hands. This recipe is worth every minute (and twist!), and the peppermint gives it that unmistakable festive flair.
- Distinctive Peppermint Flavor: It’s the peppermint extract that truly sets these cookies apart, delivering a bright, minty burst in every bite.
- Playful Candy Cane Shape: Handmade twisting of dough ropes turns baking into a fun, almost therapeutic, holiday craft.
- Perfect Texture Balance: Tender yet sturdy enough to hold their shape, these cookies strike the ideal sugary crunch without being too hard.
- Great for Sharing and Gifting: Their look and flavor make them wonderful for cookie exchanges, gifts, or festive platters.
Ingredients & Why They Work
Each ingredient in this Candy Cane Cookies with Peppermint Flavor Recipe plays its part to achieve that classic, melt-in-your-mouth sugar cookie that’s brightened up with peppermint. Plus, the use of cream of tartar adds a subtle tang that helps with texture. Here’s what you’ll need and why you can trust these pantry staples.
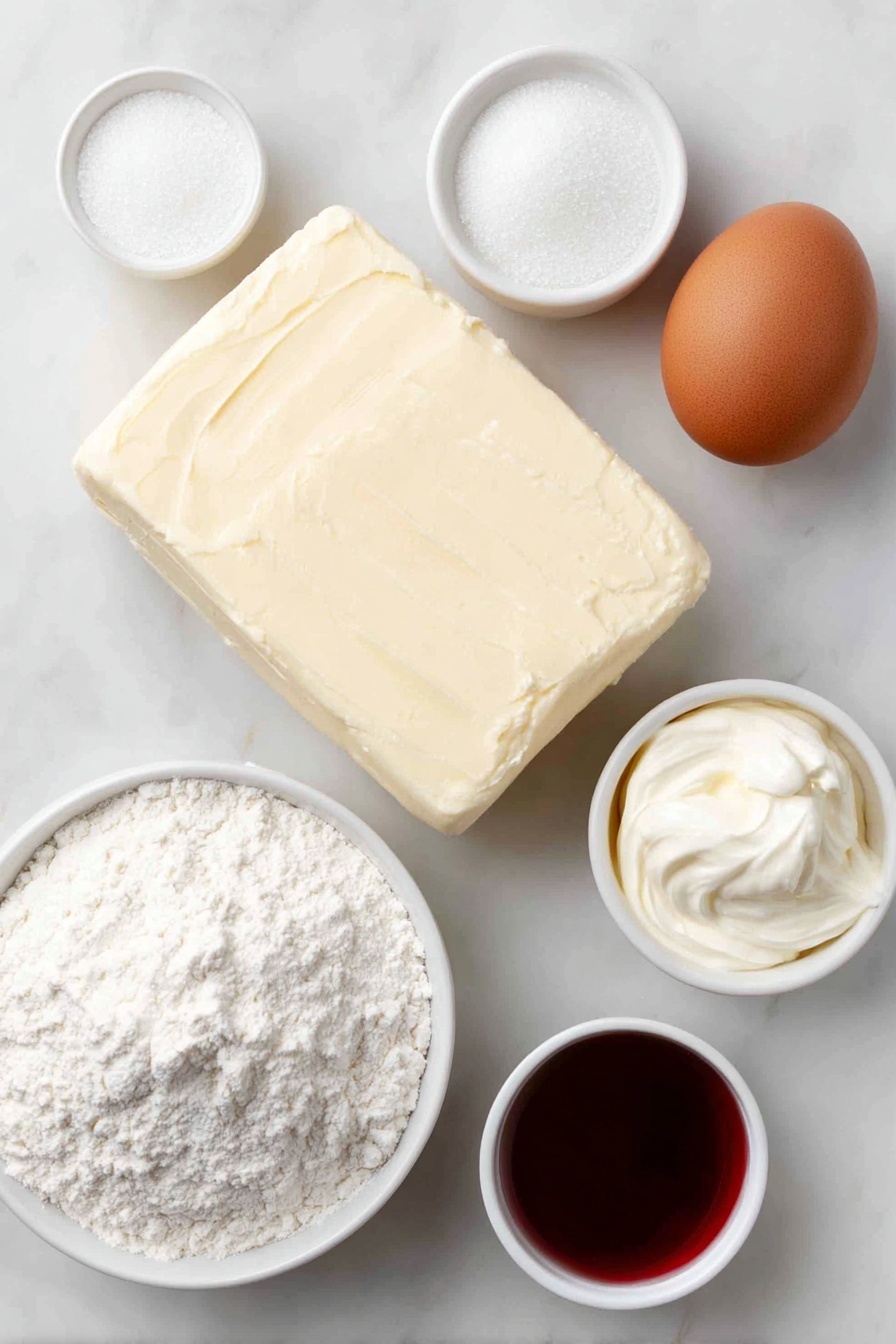
- Unsalted butter: Using softened, unsalted butter lets you control salt levels and creates that rich, tender base.
- Granulated sugar: This sweetens and helps create that crisp texture on the edges while keeping the inside soft.
- Cream of tartar: This stabilizes the dough and contributes to the cookie’s slight chewiness and perfect rise.
- Heavy cream: Adds richness and moisture, making sure the cookies stay soft without drying out.
- Egg: Acts as a binder, giving structure and helping everything come together beautifully.
- Peppermint extract: The star of the show for that authentic candy cane flavor you crave.
- Clear vanilla flavoring: Ensures your cookie stays bright white where needed, balancing the peppermint without muddying colors.
- Baking powder: Gives a gentle lift, making these cookies light and not too dense.
- All-purpose flour: The foundation for the dough—it’s sturdy enough to hold shape but soft enough to bite into.
- Red squeeze gel color: This vibrant gel delivers vivid candy cane stripes without thinning the dough like liquid colorings would.
Make It Your Way
I love to play around with this Candy Cane Cookies with Peppermint Flavor Recipe depending on the season or who I’m baking for. You can definitely make the peppermint stronger or milder, or toss in tiny chocolate chips for a surprise bite amidst the minty sweetness. Don’t be afraid to tweak!
- Variation: Once, I swapped half the peppermint extract for almond extract for a more complex flavor profile; it was a hit at my family’s holiday party!
- Dietary modification: You can experiment with gluten-free flour blends if you want to make these allergy-friendly—just mind the texture changes.
- Difficulty level: If you’re new to shaping cookies, try chilling the dough a bit longer to make it easier to roll and twist.
Step-by-Step: How I Make Candy Cane Cookies with Peppermint Flavor Recipe
Step 1: Creaming Your Base
Start by creaming your softened butter on medium-high speed until it’s fluffy — about 1½ to 2 minutes. This step mixes in air, making your cookies light and tender. Then, slowly add sugar, cream of tartar, and heavy cream, upping speed slightly until everything looks pale and a little billowy, around 2–3 minutes. This fluffy mixture is the foundation of soft, melt-in-your-mouth cookies.
Step 2: Flavor and Flour Join the Party
Reduce speed again and mix in the egg until fully combined — this is what holds your dough together nicely. Add in your peppermint extract and clear vanilla flavoring next; this is where the magical mint flavor truly kicks off. Slowly incorporate baking powder and the flour, half a cup at a time, mixing just enough to blend but no more — you don’t want tough cookies!
Step 3: Color and Chill
Divide the dough into two equal parts. Pop one back into the fridge wrapped up tight—this is your white dough, which needs to stay crisp and clean. Add that gel red coloring to the other half, mixing slowly until it’s a smooth, uniform candy-apple red. Then chill both dough balls for at least an hour. This resting period is key to keeping your shapes intact when you roll ’em out later.
Step 4: Shaping Your Candy Canes
Once chilled, take both doughs out and portion them into smaller balls—about half a tablespoon each. Roll each little piece into a tight ball, then gently roll into 5-inch ropes. (Pro tip: keep your hands cool as you roll to prevent the dough from softening too much.) Press a red and white rope together at the bottom, then twist lightly but firmly into the classic candy cane spiral. Lay each one on a parchment-lined baking sheet, curve the top of each rope into a hook, and make sure they’re spaced at least two inches apart.
Step 5: Bake and Cool
Pop them into a preheated 350°F oven for about 7 minutes. Watch closely—the edges should set but not brown. Let cookies cool on the pan for 10 minutes before transferring to a rack, which lets them firm up perfectly in that candy cane shape. Repeat for the remaining dough and enjoy that peppermint-sweet aroma filling your kitchen!
Top Tip
Having baked these many times over holidays past, I’ve learned some little tricks that make all the difference. Paying attention to chilling the dough and keeping your hands cool while shaping are absolute game changers!
- Chill Thoroughly: Don’t skip or shorten the chilling step—it prevents spreading and keeps your candy cane shapes looking crisp and perfect.
- Cool Hands Matter: Warm hands can make the dough soft and sticky, which causes misshapen twists. Keep a bowl of cold water nearby to cool off your fingers if needed.
- Use Parchment Paper: Always roll and twist your dough on parchment-lined surfaces to avoid stains and mess, especially from the red gel coloring.
- Watch the Oven: Every oven’s heat is a little different—7 minutes is typical, but check early to avoid over-baking and losing that tender texture.
How to Serve Candy Cane Cookies with Peppermint Flavor Recipe
Garnishes
I usually keep these cookies simple because their peppermint punch and perfect candy cane stripes are showstoppers. But on occasion, I lightly dust a few with powdered sugar for a snowy effect—adds a lovely touch for holiday parties.
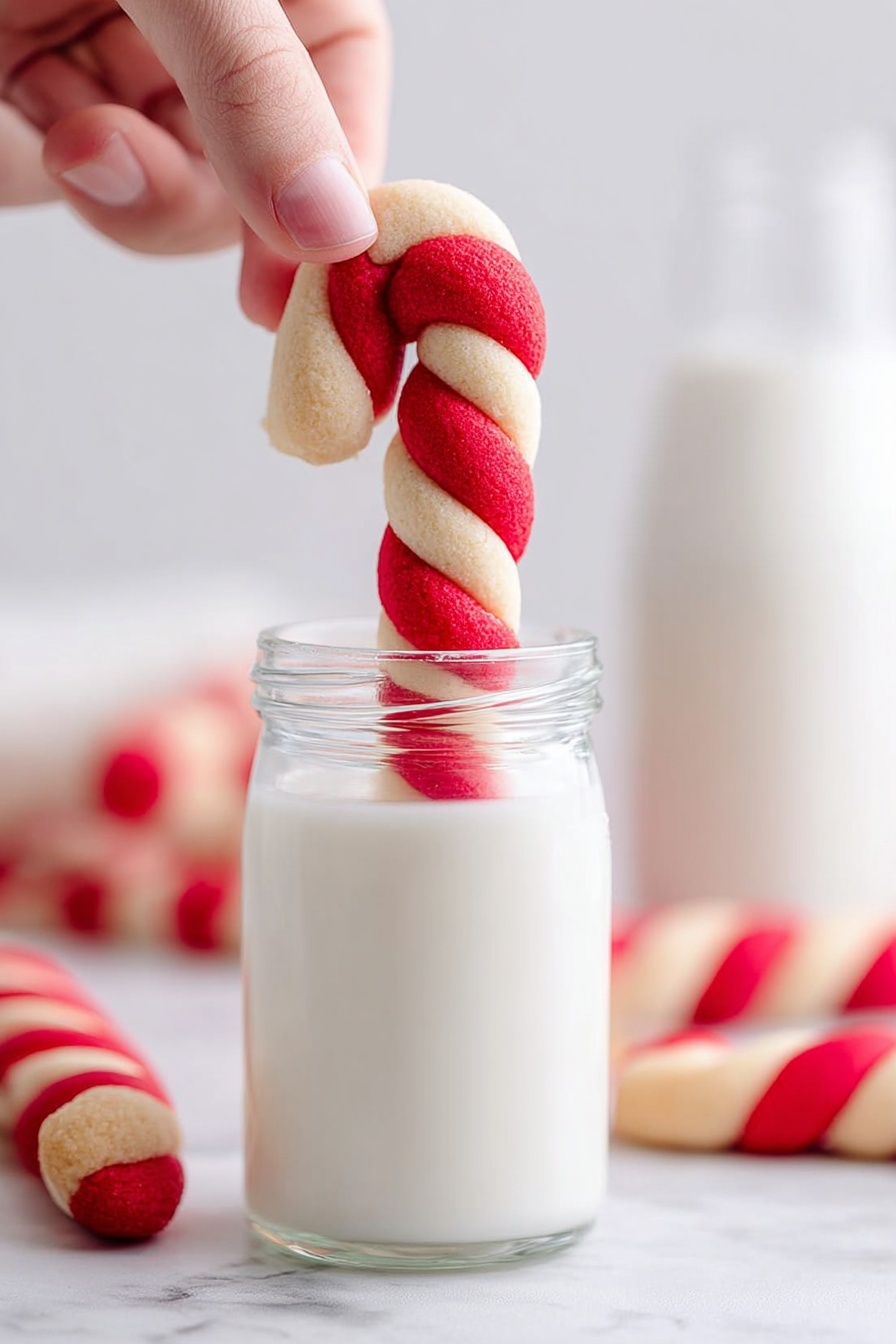
Side Dishes
Pair these Peppermint Candy Cane Cookies with a creamy hot chocolate or a mug of eggnog to get the full festive experience. They’re also delightful alongside some buttery shortbread or a small cheese platter if you want to mix flavors.
Creative Ways to Present
For holiday gatherings, I’ve arranged these cookies standing upright in mason jars or nestled in festive tins with some red and white striped ribbons. Twirling a few peppermint sticks around them really amps up the seasonal charm—kids and adults both love it!
Make Ahead and Storage
Storing Leftovers
Leftover candy cane cookies keep really well—just store them airtight at room temperature for up to a week. I find a tightly sealed cookie tin or container is perfect to keep them crisp and fresh without drying out.
Freezing
I often freeze these cookies when I bake in bulk before the holidays. Wrap them individually in parchment or plastic wrap, then place in a freezer-safe container. They thaw quickly at room temp and taste just as delightful, almost like fresh-baked.
Reheating
If you want to restore that just-baked warmth, pop the cookies in a warm (not hot) oven for a few minutes, or microwave for 5–7 seconds. This brings back softness and highlights the peppermint aroma without burning.
Frequently Asked Questions:
You can, but keep in mind that regular vanilla tends to have a deeper color which might slightly tint the white dough. For the best candy cane contrast, clear vanilla is recommended but not absolutely necessary.
Cream of tartar helps give these cookies a slight chew and stabilizes the dough. If you don’t have it, you can omit it, but your cookies might be a bit crisper and less tender. Alternatively, you can substitute with an equal amount of lemon juice or white vinegar.
The key is chilling the dough thoroughly before shaping and baking. Also, keeping your hands cool while rolling helps maintain the ropes’ firmness, preventing flattening or spreading during baking.
Absolutely! You can reduce the peppermint extract and add almond extract, or gently fold in mini chocolate chips before shaping. Just be mindful that additional mix-ins may affect dough texture and shaping ease.
Final Thoughts
This Candy Cane Cookies with Peppermint Flavor Recipe has become one of my holiday baking essentials. Whether I’m making them solo or with the family, the process of twisting those red and white ropes always brings such joy—and when you bite into their soft, minty sweetness, it feels like a little festive hug. Trust me, once you try these, you’ll want to bake a batch every season. So go ahead, tie on your apron, and make your kitchen smell like Christmas.
Print
Candy Cane Cookies with Peppermint Flavor Recipe
- Prep Time: 30 minutes
- Cook Time: 7 minutes
- Total Time: 1 hour 37 minutes
- Yield: 48 servings
- Category: Dessert
- Method: Baking
- Cuisine: American
- Diet: Vegetarian
Description
Delightfully festive Candy Cane Cookies featuring peppermint-flavored sugar cookie dough twisted with vibrant red dough to create charming candy cane shapes. Perfectly buttery, fluffy, and crisp with a festive peppermint aroma, these cookies are ideal for holiday celebrations and gifting.
Ingredients
Cookie Dough
- 1 cup (2 sticks) unsalted butter softened
- 1½ cups granulated sugar
- ½ teaspoon cream of tartar
- 1 tablespoon heavy cream
- 1 large egg room temperature
- 1½ teaspoons pure peppermint extract
- 1¼ teaspoons clear vanilla flavoring
- ⅛ teaspoon baking powder
- 3 cups all-purpose flour
Coloring
- ½ teaspoon red squeeze gel color
Instructions
- Cream the Butter: Using a stand mixer or handheld mixer with a large bowl on medium-high speed, cream the softened unsalted butter for 1½ to 2 minutes until smooth.
- Add Sugar Mixture: Reduce mixer speed to low and add granulated sugar, cream of tartar, and heavy cream. Increase speed to medium and beat for 2 to 3 minutes until the mixture is fluffy and light.
- Add Egg: Lower mixer speed to low and add the egg. Mix until fully incorporated and smooth.
- Flavor the Dough: Add the peppermint extract and clear vanilla flavoring, mixing briefly to combine.
- Add Dry Ingredients: On low speed, slowly add baking powder and all-purpose flour in ½ cup increments, mixing until the flour disappears and dough forms with no visible streaks.
- Divide Dough: Split the dough into two equal balls. Return one ball to the mixing bowl to color red. Cover the other ball (white dough) with plastic wrap and refrigerate both for 1 hour.
- Color Red Dough: Add ½ teaspoon red gel color to the dough in the mixing bowl. Mix on low speed until the color is uniform with no white streaks. Cover and refrigerate the red dough for 1 hour.
- Preheat Oven: Just before dough is ready, preheat oven to 350°F and line baking sheets with parchment paper.
- Scoop Dough Balls: Split both red and white dough in half. Cover your counter or cutting board with parchment paper to avoid staining. Using a ½ tablespoon scoop, take equal-sized portions of red and white dough and roll each into a tight round ball. Chill balls again for 10-15 minutes for best shape retention.
- Roll Ropes: Using cool hands, roll each red and white dough ball into 5-inch-long ropes, ensuring they stay rounded and do not flatten.
- Twist Ropes: Lightly press the bottoms of the two ropes together. Gently twist them, maintaining rounded shape without flattening.
- Shape Candy Canes: Place twisted ropes on prepared baking sheet, spacing cookies 2 inches apart. Curve the top of each twisted rope into a candy cane shape.
- Bake Cookies: Bake in preheated oven for 7 minutes until edges are set and bottoms lightly golden.
- Cool Cookies: Allow cookies to cool on baking sheet for 10 minutes before transferring to cooling racks to cool completely.
- Repeat Process: Take remaining red and white dough from refrigerator and repeat steps 9 through 13.
- Store Cookies: Once completely cooled, store cookies in an airtight container to maintain freshness.
Notes
- Chilling the dough is essential to minimize cookie spreading and helps maintain the candy cane shape during baking.
- Oven temperatures may vary, so monitor cookies closely towards the end of baking to avoid over- or under-baking.
- Peppermint extract is key for the signature flavor; omit for a classic sugar cookie taste.
- Use parchment paper on the work surface to prevent red dye from staining counters or boards.
- Keep hands cool while rolling dough ropes to preserve structure and prevent dough from becoming too soft.
- When twisting, keep ropes rounded rather than flattened for authentic candy cane appearance.
Nutrition
- Serving Size: 1 cookie
- Calories: 120 kcal
- Sugar: 8 g
- Sodium: 60 mg
- Fat: 6 g
- Saturated Fat: 3.5 g
- Unsaturated Fat: 2 g
- Trans Fat: 0 g
- Carbohydrates: 15 g
- Fiber: 0.5 g
- Protein: 1 g
- Cholesterol: 20 mg


Leave a Reply